
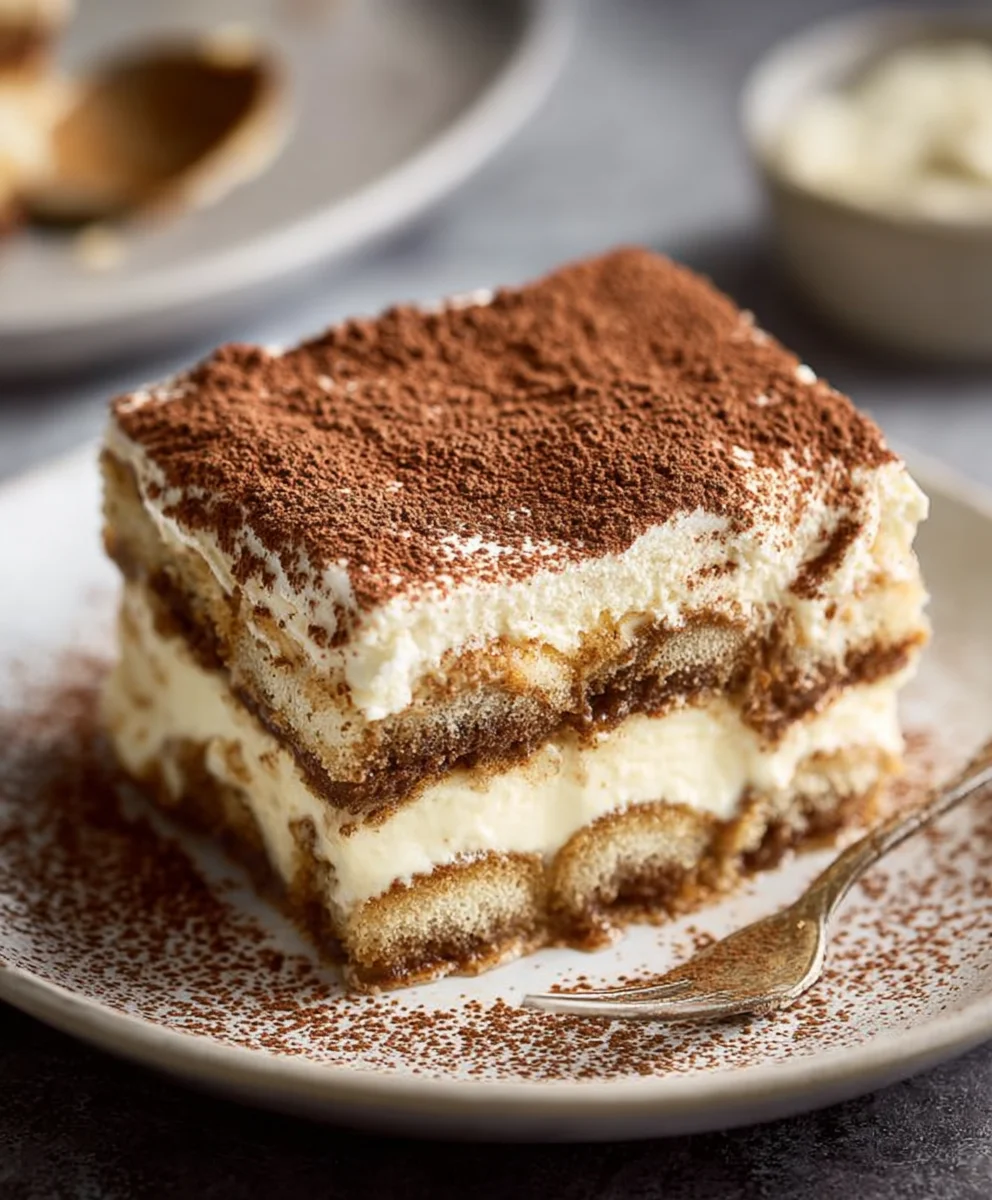
Tiramisu. Just uttering its name evokes a sense of luxurious indulgence, a delicate balance of coffee, cream, and cocoa that has captivated dessert lovers worldwide. This iconic Italian delight is more than just a sweet treat; it’s an experience, a moment of pure bliss that truly lives up to its name, which translates to “pick me up” or “cheer me up.”
Hailing from the Veneto region of Italy, the precise origins of this beloved dessert are often debated, adding to its mystique. What isn’t debatable, however, is its incredible ability to charm. People adore Tiramisu for its unparalleled combination of textures and flavors: the gentle bitterness of espresso-soaked ladyfingers, the velvety richness of a mascarpone cheese mixture, often enhanced with a hint of liqueur, and a final flourish of finely sifted cocoa powder. It offers a sophisticated sweetness that is never cloying, a perfect harmony that makes it a perennial favorite for celebrations, intimate dinners, or simply as a comforting indulgence.
I am thrilled to guide you through the process of recreating this culinary masterpiece in your own kitchen. Prepare to enchant your taste buds!

Ingredients:
My dear friends, creating a truly magnificent Tiramisu starts with the finest ingredients. Think of them as the building blocks for an unforgettable dessert experience. Here’s what you’ll need:
- For the Mascarpone Cream:
- 6 large egg yolks (only the yolks, please!)
- 3 large egg whites (we’ll whip these for extra lightness)
- ¾ cup (150g) granulated sugar, divided (we’ll use this in two stages)
- 2 pounds (900g) high-quality mascarpone cheese, chilled
- 1 teaspoon pure vanilla extract (optional, but I find it adds a lovely depth)
- A tiny pinch of salt (to bring out all those wonderful flavors)
- For the Coffee Soaking Liquid:
- 2 cups (480ml) freshly brewed strong espresso or very strong coffee, cooled to room temperature
- ½ cup (120ml) coffee liqueur, dark rum, Marsala wine, or brandy (choose your favorite, or a mix! For an alcohol-free version, simply omit)
- For the Assembly:
- Approximately 24-30 (depending on size) Savoiardi ladyfingers (make sure they are the firm, Italian kind, not the soft, cakey ones)
- Unsweetened cocoa powder, for dusting (the good quality stuff makes a difference)
Preparing the Espresso Soaking Mixture for Your Tiramisu
Ah, the foundation of our magnificent Tiramisu! The coffee element is absolutely crucial, imparting that signature aroma and flavor. This step is wonderfully straightforward, but attention to detail here will truly elevate your final dish.
- Brew Your Coffee or Espresso: First things first, we need some strong coffee. I always recommend using freshly brewed espresso if you have an espresso machine. If not, don’t fret! A very strong, dark-roast coffee will do the trick beautifully. The key is potency – we want a robust flavor that can stand up to the rich mascarpone cream. Brew about 2 cups (480ml) of this liquid gold.
- Cool it Down: Once brewed, transfer your coffee or espresso to a shallow dish or bowl. It’s absolutely vital that this liquid cools down completely to room temperature before we even think about dipping our ladyfingers. Dipping warm or hot ladyfingers would turn them into a soggy, disintegrating mess, and nobody wants a mushy Tiramisu! Patience is a virtue here. You can speed up the cooling process by placing the bowl in an ice bath, stirring occasionally, or simply making it well in advance.
- Incorporate the Liqueur: Once your coffee is completely cool, it’s time to add your chosen liqueur. This is where you can truly personalize your Tiramisu. I love using a good quality coffee liqueur for an extra coffee kick, or a dark rum for its warming, slightly molasses notes. Marsala wine or brandy also work wonderfully, lending a traditional Italian touch. Measure out ½ cup (120ml) and stir it into your cooled coffee. If you prefer an alcohol-free Tiramisu, simply omit the liqueur entirely. The coffee alone will provide plenty of flavor, or you could add a teaspoon of vanilla extract or a hint of almond extract to the coffee for a different nuance. Give it a good stir to ensure it’s well combined. This is our perfect soaking solution, ready and waiting to infuse those ladyfingers with glorious flavor.
Crafting the Zabaglione Base for Your Tiramisu Cream
This is where a bit of technique comes into play, but please don’t be intimidated! Creating a beautiful zabaglione (a custard-like cream made with egg yolks, sugar, and often wine) is a cornerstone of an authentic and utterly delicious Tiramisu. This step ensures a rich, stable, and incredibly flavorful base for our mascarpone cream.
- Prepare Your Double Boiler: We’ll be cooking the egg yolks over a double boiler to gently heat and thicken them without scrambling. Set up a heatproof bowl (preferably stainless steel or glass) over a saucepan containing about 1-2 inches of simmering water. Important: Make sure the bottom of the bowl does not touch the water. We want the steam to cook the eggs, not direct heat.
- Combine Egg Yolks and Sugar: Separate your 6 large egg yolks into the heatproof bowl. Save the egg whites for later, as we’ll be whipping them to add airiness to our cream. Add ½ cup (100g) of the granulated sugar to the egg yolks in the bowl.
-
Whisk Over Heat: Place the bowl over your simmering water. Begin whisking immediately and continuously. This is crucial for preventing the eggs from cooking unevenly or scrambling. Whisk vigorously, in a figure-eight motion, making sure to scrape the bottom and sides of the bowl frequently.
What to Look For as You Whisk:
Initially, the mixture will be a vibrant yellow. As you continue to whisk, it will gradually lighten in color, becoming a pale lemon yellow. It will also thicken significantly. You’re looking for a consistency where the mixture forms a thick ribbon when the whisk is lifted, and you can see the bottom of the bowl for a second or two when you drag the whisk through it. This usually takes about 8-12 minutes of continuous whisking. The temperature of the mixture should reach around 160°F (71°C) if you have a thermometer, which ensures the yolks are safely pasteurized. This is a key step for creating a safe and stable Tiramisu.
- Remove from Heat and Continue Whisking: Once the zabaglione has reached the desired thickness and color, immediately remove the bowl from the heat. Don’t stop whisking just yet! Continue to whisk for another 2-3 minutes off the heat. This helps to cool the mixture down slightly and prevents any residual heat from overcooking the eggs.
- Cool Completely: Transfer the bowl to an ice bath (a larger bowl filled with ice and a little water) or simply let it cool down to room temperature. Stir occasionally to ensure even cooling. This step is absolutely critical. The zabaglione must be completely cool before you fold it into the mascarpone. Adding warm zabaglione to cold mascarpone will cause the mascarpone to become runny and possibly curdle, ruining the texture of your Tiramisu. So, go grab a cup of tea or start your next step while this cools down properly.
Whipping the Mascarpone Cream to Perfection
Now that our zabaglione is cool and ready, it’s time to bring all the creamy elements together to create the heart of our Tiramisu. This stage focuses on achieving that luscious, airy texture that makes Tiramisu so irresistible.
- Prepare the Mascarpone: Take your chilled mascarpone cheese out of the refrigerator. It should be firm. Place the entire 2 pounds (900g) into a large mixing bowl. Add the 1 teaspoon of vanilla extract (if using) and the tiny pinch of salt. Gently beat the mascarpone with a spoon or a rubber spatula for just a minute or so to soften it slightly. You don’t want to overwork it at this stage, as mascarpone can become grainy if beaten too vigorously or for too long.
- Fold in the Cooled Zabaglione: Once your zabaglione is completely cool, add it to the bowl with the mascarpone. Using a rubber spatula, gently fold the zabaglione into the mascarpone. Use broad, sweeping motions, going from the bottom of the bowl upwards, until the two are just combined. Be careful not to deflate the air we worked so hard to incorporate into the zabaglione. The goal is a uniform, smooth, and creamy consistency.
-
Whip the Egg Whites (for Added Lightness): In a separate, very clean, and dry bowl (any trace of grease can prevent whites from whipping), add the 3 reserved large egg whites and the remaining ¼ cup (50g) of granulated sugar. Using an electric mixer on medium-high speed, beat the egg whites until they form soft, billowy peaks. They should be glossy and hold their shape when the whisk is lifted, but not stiff and dry. This step adds incredible lightness and airiness to your Tiramisu cream, making it feel less heavy and more ethereal.
Why Whip Egg Whites?
While some traditional Tiramisu recipes omit whipped egg whites, I find they contribute significantly to the texture, making the cream wonderfully light and fluffy, perfectly balancing the richness of the mascarpone and yolks. It’s a small extra step that truly elevates the experience.
- Gently Fold in the Egg Whites: Add about one-third of the whipped egg whites to the mascarpone-zabaglione mixture. Fold it in gently to lighten the base. Then, add the remaining whipped egg whites and continue to fold with the utmost care, until no streaks of white remain and the mixture is uniformly light and airy. Remember: overmixing here will deflate the whites and make your cream dense. We want fluffy! Your gorgeous Tiramisu cream is now ready for assembly.
Assembling Your Classic Tiramisu Layers
We’ve done all the hard work, and now comes the truly satisfying part – layering our beautiful components into a harmonious Tiramisu masterpiece! For this, you’ll want a rectangular or square serving dish, approximately 9×13 inches (23×33 cm) or similar, with relatively deep sides (about 3 inches).
- Prepare Your Workstation: Have your cooled espresso-liqueur mixture, your bowl of luscious mascarpone cream, your Savoiardi ladyfingers, and your serving dish all laid out. A small sifter or fine-mesh sieve for the cocoa powder will also be handy.
- Dip the Ladyfingers – Quickly!: This is perhaps the most critical step in assembly for a perfect Tiramisu. Take one ladyfinger and quickly dip it into the espresso mixture. I mean very quickly – usually just 1-2 seconds per side, depending on how absorbent your ladyfingers are. You want them to be moistened but not soggy. If they soak up too much liquid, your Tiramisu will be a watery mess. Trust me, less is more here.
- Create the First Ladyfinger Layer: Arrange the dipped ladyfingers in a single layer at the bottom of your serving dish. Break them if necessary to fit snugly, filling any gaps. The goal is an even, flat layer. This forms the delightful cakey base of your Tiramisu.
- Spread the First Cream Layer: Take approximately half of your prepared mascarpone cream and gently spread it evenly over the layer of ladyfingers. Use an offset spatula or the back of a spoon to create a smooth surface.
- Dust with Cocoa Powder: Using a fine-mesh sieve, lightly dust the cream layer with a generous amount of unsweetened cocoa powder. This adds a beautiful bitterness that cuts through the richness of the cream and provides a lovely visual contrast.
- Repeat for the Second Layer: Repeat the dipping process with the remaining ladyfingers, ensuring they are still just briefly moistened. Arrange them over the cocoa-dusted cream layer, creating your second layer of ladyfingers.
- Apply the Final Cream Layer: Spoon the remaining mascarpone cream over the second ladyfinger layer. Carefully spread it out evenly, taking care to cover all the ladyfingers and create a smooth, appealing top surface for your Tiramisu.
Chilling and Finishing Touches for Your Tiramisu
The assembly is complete, but our Tiramisu isn’t quite ready to devour just yet! This final stage is all about allowing the flavors to meld and the dessert to firm up, ensuring every bite is utterly perfect.
-
Cover and Chill: Once your Tiramisu is fully assembled, cover the dish tightly with plastic wrap. It’s crucial to seal it well to prevent any odors from the refrigerator from affecting the delicate flavors of your dessert. Now, place it in the refrigerator.
The Importance of Chilling Time:
This is where patience truly pays off! Your Tiramisu needs to chill for a minimum of 6 hours, but I honestly recommend chilling it overnight, or for at least 12-24 hours. During this time, the ladyfingers will soften further as they absorb the cream and coffee flavors, and all the wonderful elements will have a chance to meld together into that harmonious, irresistible taste we crave. The cream will also firm up, making for cleaner slices and a more enjoyable texture. Don’t rush this step!
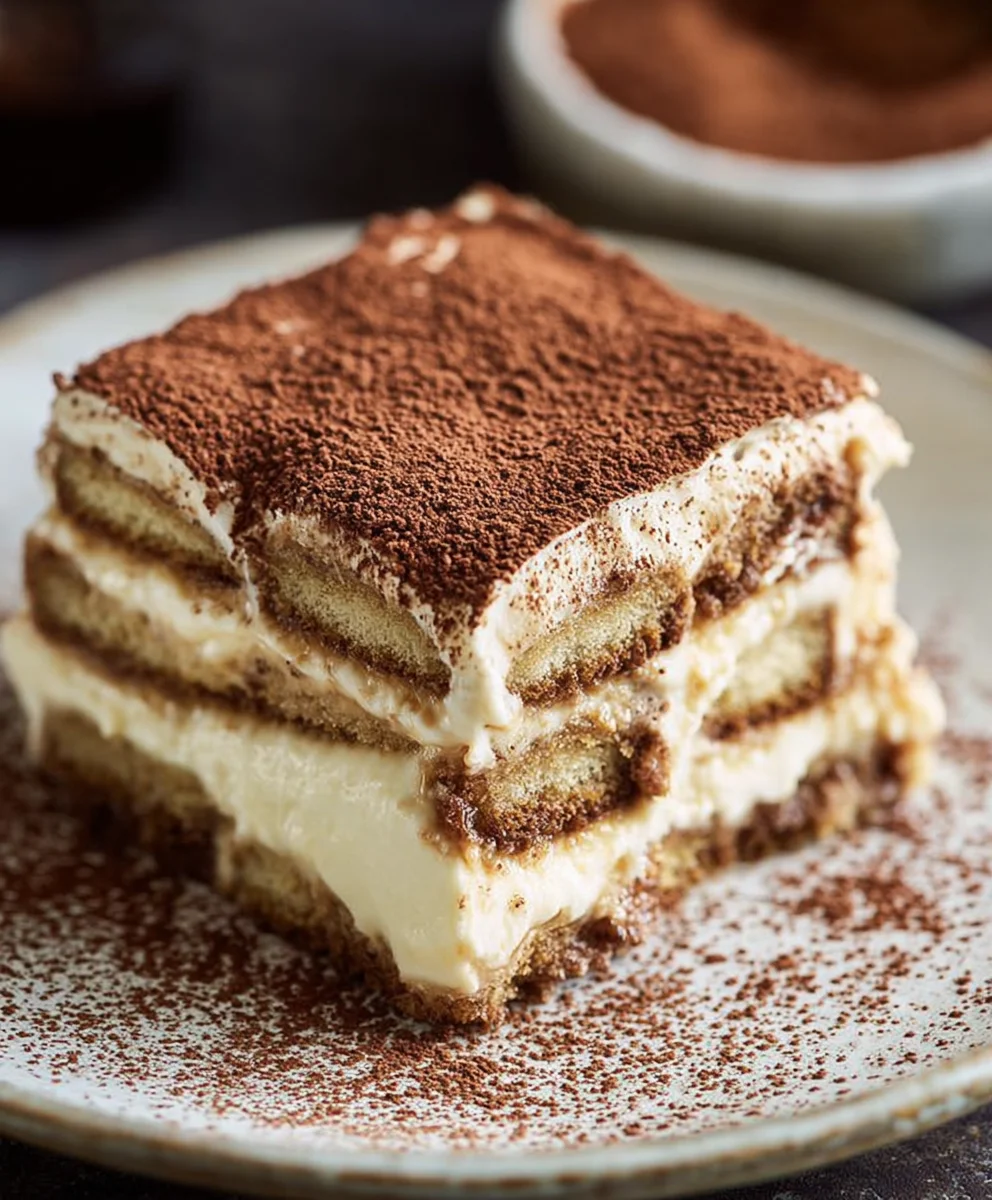
- The Grand Finale: Final Cocoa Dusting: Just before serving, uncover your perfectly chilled Tiramisu. Using a fine-mesh sieve, generously dust the entire top surface with unsweetened cocoa powder. Don’t be shy here! This final dusting provides a beautiful presentation, a lovely aroma, and that perfect hint of bitterness that complements the sweetness and richness below.
- Slice and Serve: To serve, use a sharp knife that has been run under hot water and wiped clean between each slice. This will help you achieve clean, elegant portions of your magnificent Tiramisu. Carefully lift each slice onto a serving plate.
Pro Tips and Variations for the Ultimate Tiramisu Experience
Making a truly unforgettable Tiramisu goes beyond just following a recipe; it’s about understanding the nuances and personalizing it to your taste. Here are some of my favorite tips and ideas to elevate your Tiramisu to legendary status.
The Power of Quality Ingredients for Your Tiramisu
Never underestimate the impact of high-quality ingredients. For a dessert as simple and elegant as Tiramisu, each component shines. Opt for fresh, organic eggs if possible. Choose a premium Italian mascarpone – its rich, creamy texture is irreplaceable. Your espresso or coffee should be freshly brewed and of excellent quality; stale coffee will result in a flat-tasting Tiramisu. And finally, those Savoiardi ladyfingers are specifically designed to absorb liquid without completely dissolving, so resist the urge to substitute them with softer cake-like biscuits.
Avoiding a Soggy Tiramisu: My Top Secret!
This is probably the most common pitfall when making Tiramisu. The secret to a perfect, non-soggy Tiramisu lies in the speed of dipping the ladyfingers. As I mentioned, it should be a quick dunk—literally 1-2 seconds per side, sometimes even less. The ladyfingers should be moistened, not saturated. They will continue to soften as they sit in the refrigerator, absorbing moisture from the cream. Also, ensure your espresso mixture is completely cool; warm liquid accelerates sogginess.
Alcohol-Free Tiramisu: Delicious Alternatives
If you prefer an alcohol-free version of Tiramisu, rest assured it can be just as delicious! Simply omit the liqueur from the coffee mixture. To add a bit more complexity, you can stir in a teaspoon of vanilla extract, a few drops of almond extract, or even a splash of non-alcoholic coffee syrup (like hazelnut or caramel). Another delightful option is to infuse your strong coffee with a cinnamon stick or a few cloves as it cools, then strain them out before dipping the ladyfingers. The warmth of these spices beautifully complements the coffee and cream.
Flavor Variations to Explore
- Chocolate Shavings: Instead of, or in addition to, the cocoa powder, you can finely shave dark chocolate over the cream layers for an extra textural and flavor dimension.
- Citrus Zest: A little finely grated orange or lemon zest folded into the mascarpone cream can add a surprising brightness that cuts through the richness. Start with a small amount and taste as you go.
- Nutty Notes: A tablespoon of finely ground toasted hazelnuts or almonds mixed into the cream or sprinkled between layers could add a lovely crunch and flavor.
- Different Liqueurs: Experiment with different types of liqueur! Amaretto for an almond note, Frangelico for hazelnut, or even a good quality stout or porter beer for a unique depth.
Troubleshooting Common Tiramisu Issues
- Runny Mascarpone Cream: This often happens if the mascarpone is overbeaten (it can curdle and separate) or if the zabaglione was added while still warm. Always gently fold the ingredients, and ensure all components are at the correct temperature. If it’s slightly runny, an extra hour or two of chilling can sometimes help.
- Grainy Cream: This can occur if the sugar in the zabaglione didn’t fully dissolve or if the mascarpone was overworked. Ensure thorough whisking of the egg yolks and sugar over the double boiler, and gentle handling of the mascarpone.
Storage and Making Ahead
One of the beauties of Tiramisu is that it tastes even better the day after it’s made! This makes it an ideal dessert for entertaining, as you can prepare it entirely in advance. Store your covered Tiramisu in the refrigerator for up to 3-4 days. It won’t last that long, I promise! You can also freeze individual slices or the entire dish (without the final cocoa dusting) for up to 2-3 weeks. Thaw overnight in the refrigerator before dusting with cocoa and serving. A perfect frozen slice of Tiramisu is a wonderful treat!
I genuinely hope these detailed instructions and helpful tips guide you to creating the most incredible homemade Tiramisu you’ve ever tasted. Enjoy every single, blissful bite!
Conclusion:
And there you have it, my friends! We’ve reached the sweet finale of our culinary journey together, and I truly hope you’re as excited as I am about this incredible dessert. This isn’t just another recipe; it’s an invitation to experience pure indulgence, to create something truly magical in your own kitchen. I genuinely believe this particular recipe is a must-try for everyone, from the novice baker to the seasoned dessert enthusiast. Why, you ask? Because it masterfully balances the iconic, rich flavors of espresso, creamy mascarpone, and delicate cocoa with a surprising ease of preparation. There’s a certain alchemy that happens when these simple ingredients come together, transforming into a dessert that is far greater than the sum of its parts. Imagine the aroma filling your kitchen as you dust that final layer of cocoa – it’s a promise of the delightful experience to come. The texture is a dream: soft, velvety, and airy, melting in your mouth with every decadent bite. It’s elegant enough for the most special occasions, yet comforting enough for a quiet evening treat. This recipe takes all the guesswork out of achieving that perfect balance of sweetness and bitter coffee notes, ensuring your homemade
Tiramisu is nothing short of spectacular.
Now, once you’ve crafted your masterpiece, the serving possibilities are endless, though I personally love it chilled to perfection, allowing the flavors to fully meld. For a classic presentation, serve generous slices alongside a piping hot cup of freshly brewed espresso or a robust dark roast coffee; the bitterness of the coffee beautifully complements the sweetness of the dessert. If you’re hosting a dinner party, consider pairing it with a glass of dessert wine, like a rich Marsala or a sweet Moscato d’Asti. For a lighter touch, a handful of fresh berries – raspberries or strawberries – scattered around the plate can add a wonderful pop of color and a touch of tartness that cuts through the richness beautifully. Alternatively, for individual servings that truly impress, you can assemble the Tiramisu in elegant glass goblets or small ramekins, perfect for portion control and stunning presentation. I’ve even seen it served with a small scoop of vanilla bean ice cream on the side for an extra layer of creamy delight, though I find it perfect on its own.
Beyond the traditional, don’t be afraid to get creative with variations. This recipe is wonderfully forgiving and adaptable. Want to add a different boozy kick? Experiment with Grand Marnier for a hint of orange, or even a splash of dark rum for a deeper, warmer note instead of the traditional Marsala wine. For a chocolate lover’s dream, you could sprinkle grated dark chocolate between the layers, or even drizzle a little chocolate syrup over the top before the final cocoa dusting. If you’re catering to a non-coffee drinker, you can always substitute decaffeinated espresso or even a strong hot chocolate for the coffee component, making it enjoyable for everyone. For those seeking a gluten-free option, many brands now offer delicious gluten-free ladyfingers that work perfectly. The beauty of making it yourself is the freedom to customize; make it truly your own! I encourage you to see this recipe as a canvas for your culinary imagination.
So, what are you waiting for? I wholeheartedly urge you to roll up your sleeves, gather your ingredients, and dive into the joyous process of creating this fantastic dessert. Don’t be intimidated; follow the steps, trust the process, and you’ll be rewarded with an absolutely divine treat that will impress your family and friends, or simply provide you with a moment of blissful indulgence. There’s an unparalleled satisfaction that comes from serving a homemade dessert, especially one as universally adored as this. It’s more than just food; it’s an act of love and creation. Once you’ve made it, I would absolutely love to hear about your experience! Did you stick to the classic? Did you try a fun variation? Please share your stories, your tips, and even your photos in the comments below or on social media. Your feedback and creativity inspire us all. Happy baking, and get ready to enjoy one of the most beloved Italian desserts right from your own kitchen!
Best Ever Tiramisu – Delightfully Creamy & Alcohol-Free
Indulge in this iconic Italian Tiramisu recipe, featuring velvety mascarpone cream, espresso-soaked ladyfingers, and a dusting of cocoa. This version is crafted to be alcohol-free, delivering pure bliss with every bite.
Ingredients
-
6 large egg yolks
-
2/3 cup (135g) granulated sugar, divided
-
1/4 tsp salt
-
24 oz (680g) cold mascarpone cheese
-
2 tsp (10ml) pure vanilla extract
-
1 1/2 cups (360ml) cold heavy whipping cream
-
2 cups (480ml) cold strong espresso or coffee
-
40-45 Savoiardi ladyfingers
-
1/4 cup (22g) unsweetened cocoa powder
Instructions
-
Step 1
Brew 2 cups (480ml) strong espresso or coffee and let it cool completely. For an alcohol-free version, you can add 1 tsp vanilla extract to the coffee for extra flavor. Transfer to a shallow dish. -
Step 2
In a heatproof bowl over simmering water (double boiler), whisk 6 egg yolks with 1/3 cup (67g) granulated sugar and 1/4 tsp salt until thick, pale yellow, and it forms a ribbon (approx. 8-12 mins, reaching 160°F/71°C). Remove from heat, whisk for 2-3 mins, then cool completely over an ice bath or to room temperature. -
Step 3
In a large bowl, gently beat 24 oz (680g) cold mascarpone cheese with 2 tsp (10ml) pure vanilla extract until slightly softened. In a separate, chilled bowl, whip 1 1/2 cups (360ml) cold heavy whipping cream with the remaining 1/3 cup (68g) granulated sugar until soft peaks form. -
Step 4
Gently fold the cooled zabaglione into the softened mascarpone until just combined. Then, gently fold in the whipped heavy cream in two additions until no streaks remain and the mixture is light and airy. Avoid overmixing. -
Step 5
Quickly dip ladyfingers (1-2 seconds per side) into the cooled espresso mixture. Arrange a single layer of dipped ladyfingers in a 9×13 inch dish. Spread half of the mascarpone cream evenly over the ladyfingers. Lightly dust with cocoa powder. Repeat with a second layer of dipped ladyfingers, followed by the remaining mascarpone cream. Smooth the top. -
Step 6
Cover tightly with plastic wrap and refrigerate for a minimum of 6 hours, or preferably overnight (12-24 hours), to allow flavors to meld and the cream to set. Just before serving, generously dust the entire top surface with unsweetened cocoa powder. Slice with a hot, clean knife and serve.
Important Information
Nutrition Facts (Per Serving)
It is important to consider this information as approximate and not to use it as definitive health advice.
Allergy Information
Please check ingredients for potential allergens and consult a health professional if in doubt.

Leave a Comment