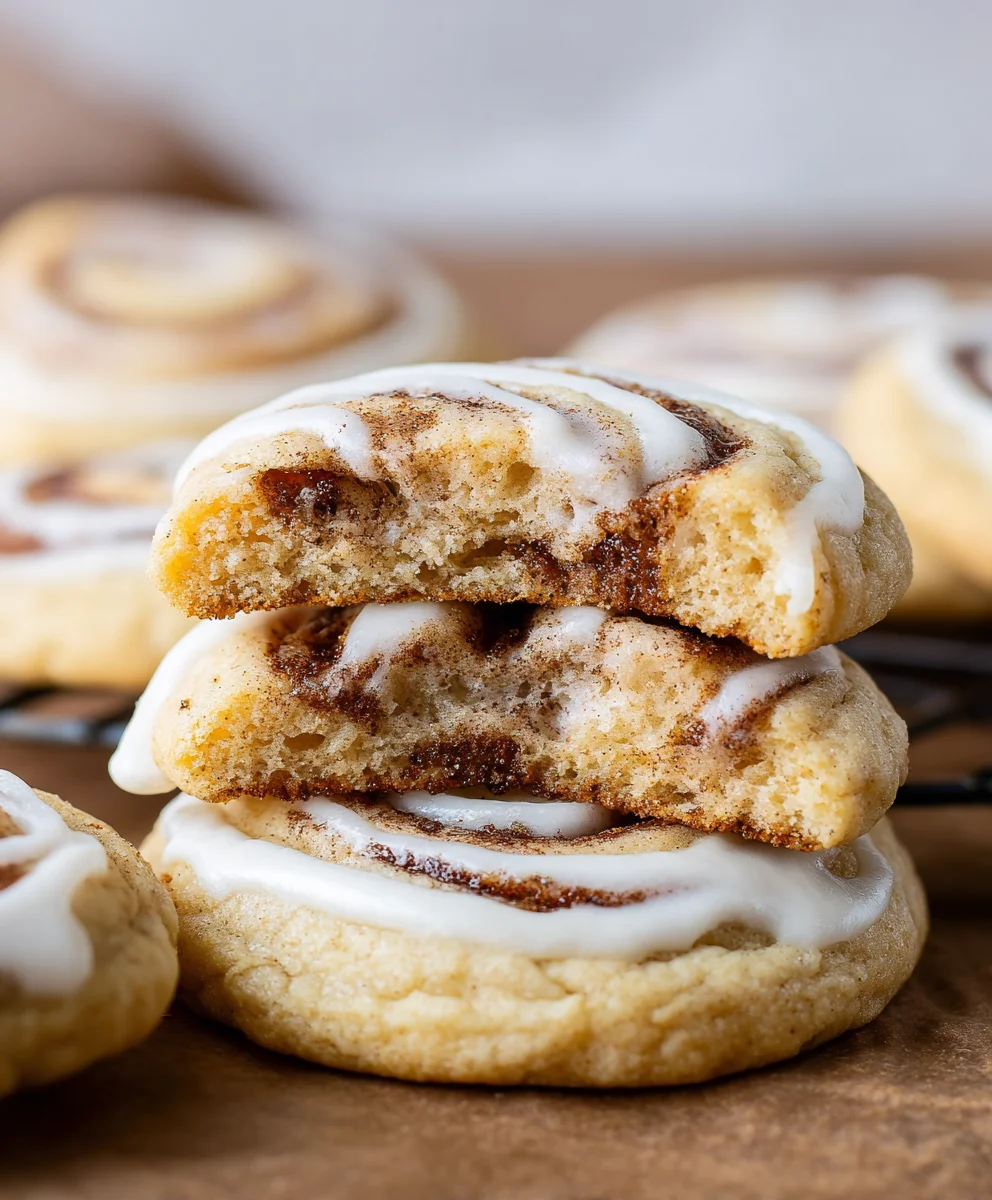
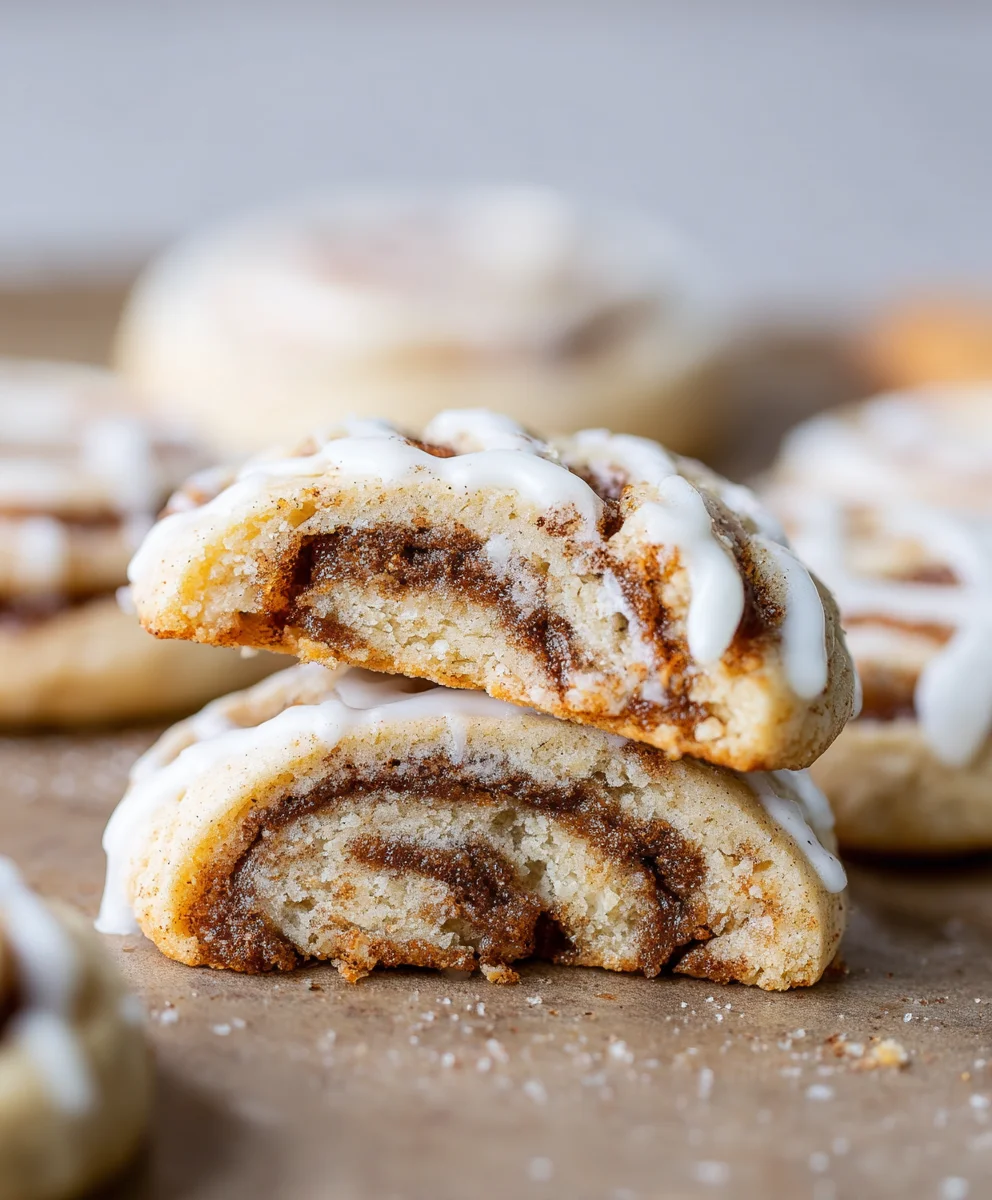
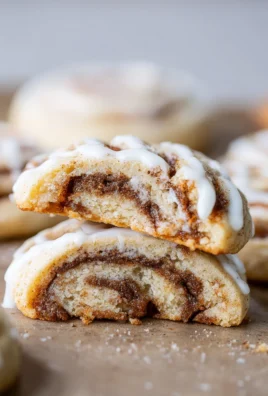
Cinnamon Roll Cookies are truly a magical confection, capturing the beloved essence of a warm, gooey cinnamon bun in a perfectly portioned, incredibly convenient cookie! Imagine biting into a soft, chewy cookie infused with that iconic cinnamon sugar swirl and topped with a luscious cream cheese glaze – it’s all the joy of your favorite breakfast pastry, reimagined. While the classic cinnamon roll itself boasts a rich history, gracing breakfast tables and bakeries for centuries as a beloved treat with Scandinavian roots, these delightful cookies offer a modern, simplified take on that cherished experience.
Why You’ll Adore These Cinnamon Roll Cookies
People absolutely adore this dish because it delivers on taste, texture, and pure convenience. The intricate swirl of spiced brown sugar within a tender cookie base, coupled with that signature cream cheese “frosting,” perfectly mimics everything we adore about a full-sized cinnamon roll, but without the lengthy yeast-proofing time. They are an instant hit for impromptu gatherings, holiday cookie trays, or simply as a comforting afternoon treat with a cup of coffee. I am personally thrilled to share this recipe, as I find myself constantly reaching for another of these irresistible Cinnamon Roll Cookies; their perfect balance of sweet, spice, and chewiness is simply unmatched and an absolute crowd-pleaser.

Ingredients:
Gathering your ingredients and having them at the right temperature is the first step to baking truly amazing Cinnamon Roll Cookies. Here’s what we’ll need:
For the Cookie Dough:
- Unsalted butter: 1 cup (2 sticks or 226g), softened. Make sure it’s perfectly soft to the touch but not melted, as this is crucial for the creaming process.
- Granulated sugar: 1 cup (200g).
- Light brown sugar: 1/2 cup (100g), packed. Packing the brown sugar correctly ensures you get the right amount and moisture.
- Large eggs: 2, at room temperature. Room temperature eggs emulsify better with the butter and sugar, creating a smoother dough.
- Vanilla extract: 2 teaspoons. Use a good quality pure vanilla extract for the best flavor.
- All-purpose flour: 3 cups (360g). For accuracy, measure by weighing if possible, or spoon the flour into the measuring cup and level it off.
- Baking soda: 1 teaspoon. This helps the cookies rise and achieve a soft texture.
- Salt: 1/2 teaspoon. Balances the sweetness and enhances all the flavors.
For the Cinnamon Sugar Filling:
- Unsalted butter: 1/2 cup (1 stick or 113g), melted.
- Light brown sugar: 1 cup (200g), packed.
- Ground cinnamon: 2 tablespoons. Ensure your cinnamon is fresh for the most vibrant flavor.
For the Cream Cheese Glaze:
- Cream cheese: 4 ounces (1/2 block or 113g), softened. Again, room temperature is key for a lump-free glaze.
- Unsalted butter: 2 tablespoons (28g), softened.
- Powdered sugar (confectioners’ sugar): 2 cups (240g). You might want to sift this if it’s lumpy to ensure a super smooth glaze.
- Milk (any kind, whole, 2%, skim): 2-4 tablespoons. We’ll add this gradually to achieve the perfect consistency.
- Vanilla extract: 1/2 teaspoon.
Instructions:
Preparing the Dough for Your Cinnamon Roll Cookies
- Bring your ingredients to the right temperature: Before we dive into mixing, let’s ensure all your temperature-sensitive ingredients are ready. The unsalted butter for the cookie dough should be perfectly softened, which means it yields slightly when pressed but isn’t greasy or melted. Similarly, your eggs should be at room temperature; this aids in better emulsification, leading to a much smoother and more cohesive dough. If you’re short on time, you can quickly warm eggs by placing them in a bowl of warm (not hot!) water for about 5-10 minutes. For the cream cheese and butter destined for the glaze, make sure they are also softened; this is crucial for achieving that silky, lump-free texture later on. This attention to detail with ingredient temperatures is a small step that makes a big difference in the quality of your finished Cinnamon Roll Cookies.
- Cream the butter and sugars: In a large mixing bowl, fitted with either a stand mixer’s paddle attachment or using a hand mixer, combine the softened 1 cup (2 sticks) unsalted butter, 1 cup granulated sugar, and 1/2 cup packed light brown sugar. Beat these ingredients together on medium-high speed for a good 3-5 minutes. Your goal here is to achieve a mixture that is noticeably light in color, fluffy, and significantly increased in volume. This creaming process is vital because it incorporates air into the butter, which will contribute to the wonderfully soft and tender texture of your baked Cinnamon Roll Cookies. Don’t forget to pause and scrape down the sides of the bowl frequently to ensure everything is thoroughly combined and no pockets of unmixed ingredients remain.
- Incorporate the wet ingredients: Once your butter and sugars are perfectly creamed, reduce your mixer speed to low. Add the two large, room-temperature eggs, one at a time. Mix well after each addition, ensuring the first egg is fully incorporated before adding the second. It’s quite common for the mixture to look slightly curdled or separated after the first egg; don’t worry, it usually comes together beautifully once the second egg is added and mixed in. After the eggs are fully combined, stir in the 2 teaspoons of vanilla extract. Vanilla is more than just a flavor; it’s an aromatic bridge that enhances the warm, inviting scent profile we associate with classic cinnamon rolls, making these Cinnamon Roll Cookies truly irresistible.
- Add the dry ingredients: In a separate, medium-sized bowl, take a whisk and thoroughly combine the 3 cups all-purpose flour, 1 teaspoon baking soda, and 1/2 teaspoon salt. Whisking these dry ingredients together ensures that the leavening agents and salt are evenly distributed throughout the flour, which is essential for uniform rising and seasoning of your cookies. Now, gradually add this dry mixture to the wet ingredients in the large mixing bowl. Mix on the lowest speed until the dry and wet ingredients are just combined. The key here is to avoid overmixing! Overmixing flour can overdevelop the gluten, leading to tough, dense cookies rather than the soft, chewy Cinnamon Roll Cookies we are striving for. Stop mixing as soon as you no longer see any visible streaks of dry flour. The dough will be relatively soft at this stage.
- Chill the cookie dough: This step is non-negotiable for perfectly shaped Cinnamon Roll Cookies. Divide the soft cookie dough into two equal halves. Gently flatten each half into a disc shape, then wrap each disc tightly in plastic wrap. Transfer these wrapped dough discs to the refrigerator and chill for a minimum of 30 minutes. Chilling the dough serves several critical purposes: it helps the dough firm up, making it much easier to roll out evenly, and it prevents the cookies from spreading excessively during baking, thus preserving their beautiful swirl shape. While it might be tempting to skip this chilling period, trust me, it’s worth the wait for superior results. If you’re planning ahead, you can even chill the dough for up to 2-3 days.
Crafting the Cinnamon Sugar Filling
- Melt the butter: In a small, microwave-safe bowl or a small saucepan over very low heat, gently melt 1/2 cup (1 stick) of unsalted butter. Ensure the butter is fully liquid, but be careful not to let it get boiling hot, as this could scald the sugar later.
- Combine filling ingredients: In a medium bowl, whisk together the melted butter, 1 cup packed light brown sugar, and 2 tablespoons ground cinnamon. Continue whisking until you achieve a thick, smooth, and paste-like consistency. The brown sugar should be fully dissolved in the butter, and the cinnamon should be evenly distributed, creating a rich, aromatic paste. Using fresh ground cinnamon is important here, as older cinnamon can lose its potency and flavor. This luscious mixture is the very essence of the “cinnamon roll” experience in these cookies, so ensure it’s well-combined and spreadable. Set it aside, and the residual warmth from the butter will help keep it at the ideal consistency for spreading.
Assembling and Shaping Your Cinnamon Roll Cookies
- Prepare your workspace: Before you begin rolling, lightly dust a clean work surface (such as a large cutting board or your countertop) with a sprinkle of all-purpose flour. Gather your rolling pin, and set it within easy reach. At this point, it’s also a good idea to preheat your oven to 375°F (190°C) and line two large baking sheets with parchment paper or silicone baking mats. This preparation ensures your beautiful Cinnamon Roll Cookies won’t stick, facilitating easy removal and cleanup.
- Roll out the first dough half: Retrieve one disc of chilled cookie dough from the refrigerator. Place it on your lightly floured surface. Using your rolling pin, carefully roll the dough into a roughly 12×10-inch rectangle, aiming for a thickness of about 1/4 inch. Try your best to keep the edges as straight as possible, but don’t fret over absolute perfection; any minor imperfections will only add to the homemade charm of your cookies. If the dough starts to stick at any point, simply dust a little more flour onto your surface and rolling pin.
- Spread the cinnamon filling: Now, evenly spread half of the prepared cinnamon sugar filling over the entire surface of the rolled-out dough rectangle. Make sure to leave a clear 1/2-inch border along one of the long edges of the rectangle. This small border will be essential later for sealing the dough log tightly. Ensure the filling extends almost to the very edges on the other three sides to maximize the delicious cinnamon flavor in every single bite of your future Cinnamon Roll Cookies.
- Roll the dough: Starting from the long edge opposite the unfilled border, carefully and quite tightly roll the dough into a log. The tighter you roll it, without tearing the dough, the more distinct and beautifully defined your cinnamon swirls will be in the finished cookies. Take your time with this step to ensure an even roll. Once you reach the end, firmly pinch the seam closed along that 1/2-inch border to securely seal the log.
- Slice the cookies: With your dough log now formed, it’s time to slice it into individual cookies. Using a very sharp knife, or for even cleaner cuts, unflavored dental floss, slice the log into 1/2-inch thick rounds. If using dental floss, slide a piece underneath the log, cross the ends over the top, and pull firmly to cut cleanly through the dough. This method often prevents squishing the dough and yields perfectly round slices. You should be able to get approximately 18-20 cookies from each log, depending on how thickly you slice them.
- Arrange on baking sheets: Carefully transfer the sliced Cinnamon Roll Cookies to your prepared baking sheets, ensuring they are spaced about 2 inches apart. These cookies will spread slightly during baking, so giving them ample room is important to prevent them from merging into one giant cookie.
- Repeat with the second dough half: While you work on the next batch, it’s a good idea to place the first baking sheet of formed cookies back into the refrigerator. This slight chill before baking helps the cookies maintain their intricate swirl shape even better. Now, repeat steps 2-6 with the second disc of chilled dough and the remaining half of the cinnamon sugar filling.
Baking Your Delicious Cinnamon Roll Cookies
- Bake until golden: Carefully place your baking sheets of Cinnamon Roll Cookies into your preheated 375°F (190°C) oven. Bake for approximately 9-12 minutes. Baking times can vary quite a bit depending on your specific oven, so it’s essential to keep a close eye on them, especially during the last few minutes. You’re looking for cookies whose edges are just lightly golden brown and whose centers appear to be set, though they might still look slightly soft or underdone in the very middle. Remember, cookies continue to cook slightly from residual heat after they’re removed from the oven. It is crucial not to overbake these cookies, as doing so will cause them to lose their signature soft, tender, and chewy texture.
- Cool the cookies: Once baked to perfection, remove the baking sheets from the oven and let the cookies cool directly on the sheets for about 5 minutes. This brief cooling period allows the cookies to firm up slightly, making them much easier to transfer without breaking. After 5 minutes, carefully use a spatula to transfer the partially cooled cookies to a wire rack to finish cooling completely. It’s really important for the cookies to be entirely cool to the touch before we move on to glazing; if they’re even slightly warm, our beautiful glaze will simply melt and run, creating a messy rather than magnificent finish. Patience truly is a virtue when waiting for these delightful Cinnamon Roll Cookies!
Preparing the Irresistible Cream Cheese Glaze
- Cream cheese and butter: In a medium-sized mixing bowl, using an electric mixer (either stand or hand-held), beat together the 4 ounces of softened cream cheese and 2 tablespoons of softened unsalted butter until the mixture is wonderfully smooth and creamy. As emphasized before, both ingredients must be at room temperature to prevent any lumps from forming in your glaze. This rich, tangy combination forms the quintessential base for a classic cream cheese glaze, which is an absolutely essential component for the full “cinnamon roll” experience, and thus, for these amazing Cinnamon Roll Cookies.
- Add powdered sugar: Gradually add the 2 cups of powdered sugar to the cream cheese and butter mixture. Start by beating on low speed until the sugar is just incorporated to avoid a powdered sugar cloud in your kitchen! Once incorporated, increase the speed to medium-high and beat until the glaze is completely smooth and free of any lumps. If your powdered sugar tends to be clumpy, consider sifting it before adding it to ensure the silkiest possible glaze texture.
- Adjust consistency with milk and vanilla: Now, stir in the 1/2 teaspoon of vanilla extract. Then, begin to gradually add the milk, 1 tablespoon at a time, continuing to beat until the glaze reaches your desired consistency. You will likely need between 2 and 4 tablespoons of milk. Some bakers prefer a thicker glaze that holds its shape well and sits proudly atop the cookie, while others enjoy a slightly thinner glaze that gently drips down the sides, mimicking traditional cinnamon rolls. Adjust the milk content to suit your personal preference. Beat until everything is thoroughly combined, smooth, and lump-free. Give it a quick taste and adjust for sweetness if you feel it needs a little more powdered sugar. This glaze provides the perfect balance of sweet and tangy, beautifully complementing your homemade Cinnamon Roll Cookies.
Glazing Your Finished Cinnamon Roll Cookies
- Glaze when cool: The moment you’ve been waiting for! Once your Cinnamon Roll Cookies have completely cooled to room temperature on the wire rack, it’s finally time for the grand finale – the glazing! It cannot be stressed enough: ensure they are truly cool to the touch. Even a slight warmth will cause the cream cheese glaze to melt, lose its beautiful opaque white finish, and potentially soak into the cookie, ruining that iconic cinnamon roll look.
- Apply the glaze: You have a few options for applying this delectable glaze, depending on the aesthetic you’re going for. For a wonderfully rustic, homemade appearance, simply use a spoon to generously drizzle dollops of glaze over the top of each cookie. If you prefer a more uniform and neat look, you can carefully dip the top surface of each cookie directly into the bowl of glaze, then allow any excess to drip off gently before placing them back on the wire rack. Alternatively, for a more decorative touch, you can transfer the glaze into a piping bag (or a sturdy Ziploc bag with a tiny corner snipped off) and pipe elegant lines, swirls, or a classic zigzag pattern over each cookie. This final touch truly transforms them from simple cookies into authentic-looking and tasting Cinnamon Roll Cookies.
- Set the glaze: Allow the glazed cookies to sit undisturbed for about 15-30 minutes, or until the glaze has had sufficient time to set slightly. If you plan on stacking your cookies for storage or presentation, you’ll want the glaze to be firm enough to the touch so that it doesn’t smudge or transfer.
- Storage: To keep your delightful Cinnamon Roll Cookies at their best, store them in an airtight container at room temperature. They will remain wonderfully fresh and delicious for up to 3-4 days. If your kitchen tends to be particularly warm, or if you simply prefer your glazed treats chilled, they can be stored in the refrigerator for up to a week. For longer-term enjoyment, you can freeze the unglazed cookies in an airtight container for up to 3 months; simply thaw them at room temperature and glaze them just before serving. You can also freeze already glazed cookies, although be aware that the glaze might become a little softer and slightly less firm upon thawing. Enjoy every single bite of these homemade treats!
Conclusion:
Oh, my friends, if there’s one recipe I truly implore you to bring into your kitchen, it’s this one. I am absolutely confident that these cookies will become an instant favorite, a staple in your baking repertoire, and a source of immense joy for everyone lucky enough to taste them. They are more than just a sweet treat; they’re a little bite of comfort, a hug in cookie form, and an experience that genuinely elevates your everyday snacking. I promise you, the effort is minimal, but the reward is extraordinary. We’re talking about capturing the very essence of a warm, gooey cinnamon roll—that tender, spiced dough, the sweet, buttery swirl, and the decadent glaze—all condensed into a perfectly portable, incredibly addictive cookie. It’s pure magic, and it’s right within your reach.
Why You’ll Love These Cinnamon Roll Cookies:
What makes these cookies an absolute must-try? For starters, they eliminate the lengthy proofing time and the often-intimidating rolling and cutting process of traditional cinnamon rolls. Yet, they deliver every single flavor note and comforting texture you crave from their namesake. The dough itself is wonderfully soft and pliable, a dream to work with, and bakes up to a delightful chewiness that melts in your mouth. Then there’s the filling – a rich, fragrant blend of brown sugar, cinnamon, and butter that caramelizes slightly as it bakes, creating those irresistible swirls of spice and sweetness. And let’s not forget the glaze! It’s the crowning glory, a simple yet perfect finish that adds a touch of creamy sweetness and makes each bite utterly heavenly. I find them to be incredibly forgiving, making them perfect for bakers of all skill levels, from novices to seasoned pros. Every batch I make disappears in record time, and I know yours will too. They are genuinely a celebration of flavor and a testament to how simple ingredients can create something truly spectacular. I’ve shared them with countless friends and family, and the unanimous verdict is always one of pure delight. They’re impressive enough for a special occasion, yet easy enough for a spontaneous afternoon baking session. Seriously, once you experience the aroma filling your kitchen and that first blissful bite, you’ll understand why I’m so passionate about them. The balance of spice, sugar, and buttery richness is simply perfect, making them utterly irresistible from the moment they emerge from the oven.
Serving & Variation Ideas:
Now, let’s talk about how to truly enjoy these beauties and how you can make them uniquely yours. While they are absolutely phenomenal straight from the cooling rack, still slightly warm with the glaze barely set, there are so many ways to savor them. I love to pair them with a strong cup of coffee or a warm mug of tea for a truly indulgent breakfast or an afternoon pick-me-up. They also make an incredible dessert alongside a scoop of vanilla bean ice cream, allowing the warm cookie to slightly melt the ice cream, creating a heavenly concoction. Consider packing them up as thoughtful homemade gifts during the holidays or for a special friend; they always bring a smile to anyone’s face. For variations, the possibilities are endless! You could try adding a sprinkle of finely chopped pecans or walnuts to the cinnamon sugar filling for an extra layer of crunch and nutty flavor. A tiny pinch of cardamom or nutmeg alongside the cinnamon in the filling can add a delightful complexity. For the glaze, feel free to experiment: a touch of maple extract for a maple-cinnamon roll cookie vibe, or a zest of orange or lemon for a bright, citrusy counterpoint would be absolutely divine. If you’re feeling extra decadent, a cream cheese frosting glaze, similar to what you’d find on traditional cinnamon rolls, would elevate these to an entirely new level of richness. I’ve even experimented with making mini versions, perfect for a party platter or for little hands. Don’t be afraid to play around; that’s where the real fun of baking lies!
So, there you have it. My sincere invitation for you to bake these incredible cookies. I promise, they are everything you’ve dreamed of and more. Don’t just take my word for it – whip up a batch this week, let the incredible aroma fill your home, and experience the joy of these perfect treats. And please, please, please, once you do, come back and share your experience with me! I absolutely adore hearing about your baking adventures. What did you love most about them? Did you try any exciting variations? Your feedback truly makes my day. Happy baking, and get ready to fall in love with your new favorite cookie!
Cinnamon Roll Cookies: Chewy, Sweet & Easy Recipe
Cinnamon Roll Cookies are truly a magical confection, capturing the beloved essence of a warm, gooey cinnamon bun in a perfectly portioned, incredibly convenient cookie! Imagine biting into a soft, chewy cookie infused with that iconic cinnamon sugar swirl and topped with a luscious cream cheese glaze – it’s all the joy of your favorite breakfast pastry, reimagined.
Ingredients
-
2 1/2 cups All-Purpose Flour
-
1 1/2 cups Cake Flour
-
2 tsp. corn starch
-
1 tsp. baking soda
-
1 tsp. baking powder
-
1 tsp. salt
-
1 cup unsalted butter, cubed (for dough)
-
1 1/4 cup granulated sugar
-
2 large eggs
-
2 large egg yolks
-
1 tsp. vanilla extract (for dough)
-
1 cup packed brown sugar (light or dark, for filling)
-
6 Tbsp. unsalted butter, melted (for filling)
-
2 Tbsp. ground cinnamon (for filling)
-
8 oz. cream cheese, softened (for glaze)
-
2 cups powdered sugar (for glaze)
-
2-4 Tbsp. milk (for glaze)
-
1/2 tsp. vanilla extract (for glaze)
Instructions
-
Step 1
Ensure butter, eggs, and cream cheese are at room temperature. In a separate bowl, whisk together all-purpose flour, cake flour, corn starch, baking soda, baking powder, and salt. -
Step 2
In a large mixing bowl, cream 1 cup softened unsalted butter and 1 1/4 cup granulated sugar on medium-high speed for 3-5 minutes until light and fluffy. Beat in 2 large eggs and 2 large egg yolks one at a time until fully incorporated. Stir in 1 tsp vanilla extract. -
Step 3
Gradually add the whisked dry flour mixture to the wet ingredients, mixing on low speed until just combined. Do not overmix. Divide dough into two equal halves, flatten into discs, wrap tightly in plastic, and chill in the refrigerator for a minimum of 30 minutes. -
Step 4
Melt 6 Tbsp unsalted butter. In a medium bowl, whisk the melted butter, 1 cup packed brown sugar, and 2 Tbsp ground cinnamon until a thick, smooth paste forms. -
Step 5
Preheat oven to 375°F (190°C). Line two large baking sheets with parchment paper. On a lightly floured surface, roll one chilled dough disc into a roughly 12×10-inch rectangle, about 1/4-inch thick. Evenly spread half of the cinnamon filling over the dough, leaving a 1/2-inch border along one long edge. Tightly roll the dough into a log from the long edge opposite the unfilled border, pinching the seam closed to seal. -
Step 6
Using a sharp knife or dental floss, slice the log into 1/2-inch thick rounds. Carefully transfer the sliced cookies to the prepared baking sheets, spacing them about 2 inches apart. Repeat with the second dough disc and remaining filling. Chill formed cookies on baking sheets while preparing the next batch if needed. -
Step 7
Bake in the preheated oven for approximately 9-12 minutes, or until the edges are lightly golden brown and the centers are set. Do not overbake to maintain a soft, chewy texture. Let cookies cool on the baking sheets for 5 minutes before transferring them to a wire rack to cool completely. -
Step 8
In a medium-sized mixing bowl, beat 8 oz softened cream cheese with an electric mixer until wonderfully smooth and creamy. Gradually add 2 cups powdered sugar, beating on low speed until incorporated, then increase to medium-high until smooth and lump-free. Stir in 1/2 tsp vanilla extract. Gradually add 2-4 Tbsp milk, 1 tablespoon at a time, beating until the glaze reaches your desired consistency. -
Step 9
Once the cookies have completely cooled to room temperature, generously drizzle or spread the cream cheese glaze over the top of each cookie. Allow the glazed cookies to sit undisturbed for 15-30 minutes, or until the glaze has set slightly. Store leftover cookies in an airtight container at room temperature for 3-4 days, or in the refrigerator for up to a week. Unglazed cookies can be frozen for up to 3 months; thaw and glaze before serving.
Important Information
Nutrition Facts (Per Serving)
It is important to consider this information as approximate and not to use it as definitive health advice.
Allergy Information
Please check ingredients for potential allergens and consult a health professional if in doubt.
Leave a Comment