
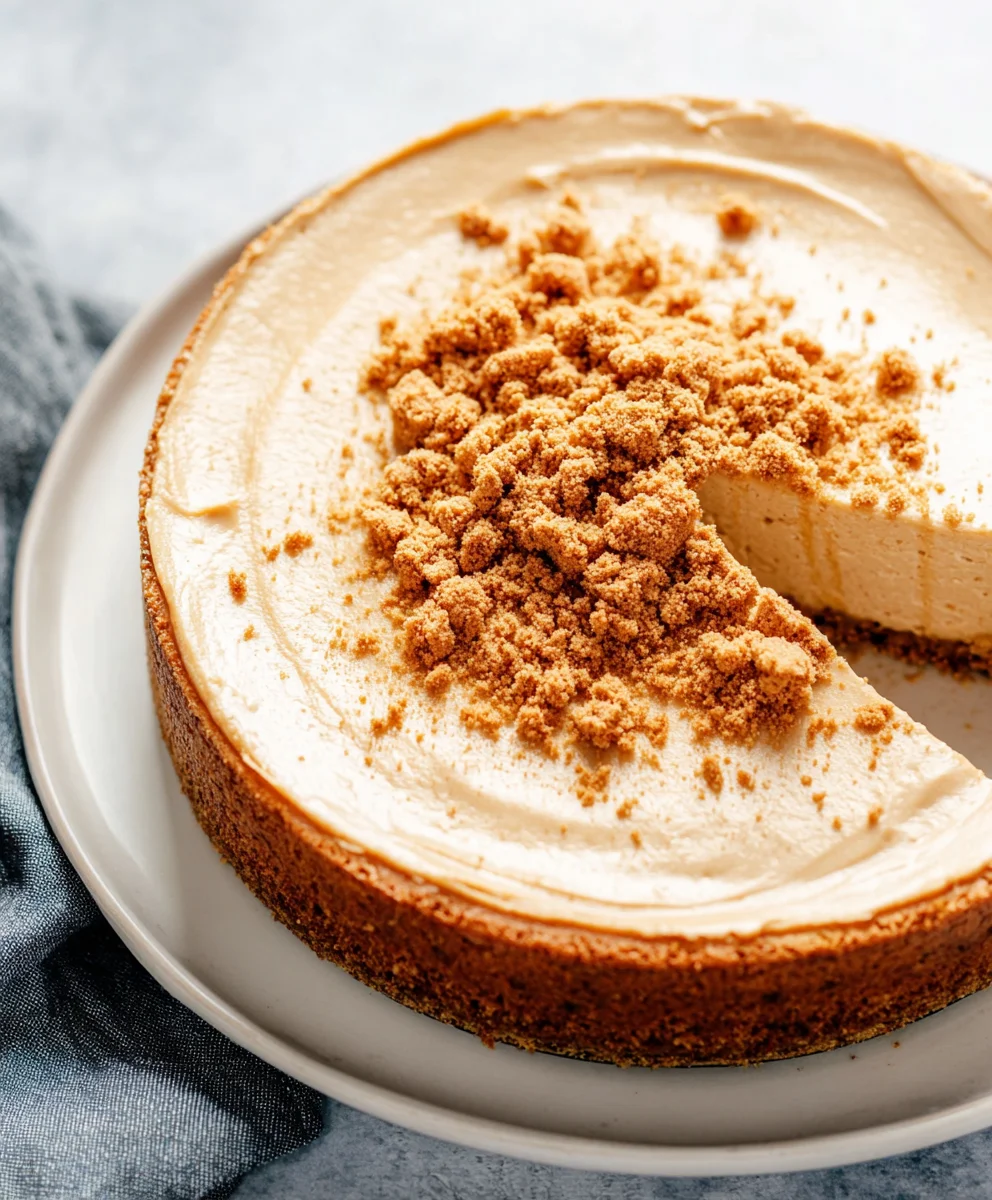
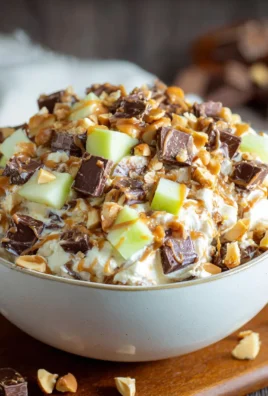
Cookie Butter Cheesecake is not just a dessert; it’s an experience waiting to unfold on your palate. Imagine the comforting warmth of spiced Speculoos cookies, their distinct caramelized notes and hint of cinnamon, ginger, and cloves, now lusciously blended into a creamy, decadent cheesecake. This delightful creation beautifully merges the beloved flavors of cookie butter – a spread originating from traditional Belgian and Dutch spiced biscuits often enjoyed during festive seasons – with the irresistible tang and silkiness of a classic cheesecake.
People around the globe have fallen head over heels for this unique fusion, drawn to its unparalleled combination of textures and tastes. From the crunchy, buttery cookie crust to the velvety smooth filling that melts in your mouth, every single bite offers a harmonious balance of sweet, spiced, and tangy notes. It’s the kind of dessert that feels both nostalgic and excitingly new, making it a perfect centerpiece for any occasion. Serving a slice of this magnificent Cookie Butter Cheesecake isn’t just offering a sweet treat; it’s presenting a moment of pure, unadulterated joy that truly encapsulates comfort and sophistication. I find it’s the ultimate crowd-pleaser, guaranteed to impress and leave everyone asking for more.

Ingredients:
For the Irresistible Cookie Crust:
- 1 ¾ cups (about 200g) finely crushed Speculoos cookies (such as Biscoff or Lotus brand) – This amounts to approximately one standard 8.8-ounce package. The fine crumbs are crucial for a sturdy, evenly textured crust.
- ½ cup (113g) unsalted butter, melted – Ensure it’s fully melted but not boiling hot. The butter acts as the binding agent, holding the cookie crumbs together.
- ¼ cup (50g) granulated sugar – A touch of sweetness to complement the cookies and balance the richness of the cheesecake.
For the Silky Smooth Cookie Butter Cheesecake Filling:
- 32 ounces (four 8-ounce packages) full-fat cream cheese, softened at room temperature – This is absolutely non-negotiable for a truly smooth and lump-free cheesecake. Let it sit out for at least 1-2 hours until it’s very pliable. Cold cream cheese will result in a lumpy batter.
- 1 ½ cups (300g) granulated sugar – Provides the essential sweetness for the cheesecake.
- ¼ cup (50g) light brown sugar, packed – Adds a deeper, more caramel-like note, enhancing the cookie butter flavor profile.
- ¼ cup (60ml) sour cream, at room temperature – The secret ingredient for an extra creamy texture and a subtle tang that balances the sweetness. Full-fat sour cream is highly recommended.
- 2 teaspoons pure vanilla extract – Opt for a good quality vanilla; it makes a noticeable difference in the overall flavor.
- ½ teaspoon fine sea salt – A small but mighty addition that truly enhances and balances all the other flavors. Don’t skip it!
- ¾ cup (200g) smooth cookie butter (such as Biscoff or Lotus brand) – This is the star of our show! Make sure it’s smooth and not crunchy for the best texture in the filling. If it’s very thick, you can gently warm it for a few seconds in the microwave to make it more pliable, but avoid making it hot.
- 4 large eggs, at room temperature – Room temperature eggs incorporate more smoothly into the batter, preventing overmixing. Gently crack them into a separate bowl before adding them to ensure no shells make it into your filling.
For the Luscious Cookie Butter Swirl/Topping:
- ½ cup (135g) smooth cookie butter – Used for drizzling and creating that beautiful, inviting swirl on top. You might want to gently warm this in the microwave for 15-30 seconds to make it easily pourable, but ensure it’s not hot, just softened.
- Optional: Additional crushed Speculoos cookies or whipped cream for garnish – For an extra flourish and delightful textural contrast.
Equipment You’ll Need:
- 9-inch springform pan – Essential for easy removal of your beautiful cheesecake.
- Heavy-duty aluminum foil – For wrapping the springform pan to create a water bath barrier.
- Large roasting pan or baking dish – To hold the springform pan in the water bath.
- Electric mixer (stand mixer with paddle attachment or hand mixer) – Crucial for achieving that perfectly smooth cheesecake batter.
- Large mixing bowls – For preparing the crust and the filling.
- Rubber spatula – For scraping down the sides of the bowl and folding ingredients.
- Measuring cups and spoons – For accurate ingredient measurements.
- Parchment paper – Optional, but can be used on the bottom of the springform for extra non-stick insurance.
- Oven thermometer – To ensure your oven is at the correct temperature, which is vital for cheesecake success.
Instructions:
Phase 1: Preparing the Irresistible Cookie Crust
- Preheat your oven and prepare the pan: Begin by preheating your oven to 350°F (175°C). This ensures your oven is at the perfect temperature when your crust is ready to bake. Take your 9-inch springform pan and, if desired, lightly grease the bottom or line it with a round of parchment paper. This step makes it even easier to remove the cheesecake later.
- Crush the cookies: In a medium-sized bowl, combine the finely crushed Speculoos cookies with the granulated sugar. You can crush the cookies by pulsing them in a food processor until they resemble fine crumbs, or by placing them in a Ziploc bag and crushing them with a rolling pin. The finer the crumbs, the more compact and stable your crust will be.
- Add melted butter: Pour the ½ cup of melted unsalted butter over the cookie crumbs and sugar mixture. Stir everything together thoroughly with a spoon or a rubber spatula until all the crumbs are evenly moistened and resemble wet sand. Every crumb should be coated in butter to ensure a firm crust.
- Form the crust: Press the cookie mixture evenly into the bottom of the prepared springform pan. Use the bottom of a flat glass or a measuring cup to firmly pack the crumbs down. This creates a dense, even base that won’t crumble when sliced. You want it to be as flat and compact as possible.
- Pre-bake the crust: Bake the crust in your preheated oven for 8-10 minutes. This pre-baking step helps to set the crust, making it crispier and preventing it from becoming soggy once the filling is added. Once baked, remove the pan from the oven and set it aside to cool completely while you prepare the filling. Allowing it to cool is important to prevent the warm crust from melting your cheesecake batter. Reduce the oven temperature to 325°F (160°C) for the cheesecake baking process.
Phase 2: Crafting the Silky Smooth Cookie Butter Cheesecake Filling
- Prepare for the water bath: While your crust cools, carefully wrap the exterior of your cooled springform pan with at least two, preferably three, layers of heavy-duty aluminum foil. Ensure the foil extends all the way up the sides of the pan to create a watertight barrier. This is absolutely critical for preventing water from seeping into your cheesecake during the water bath, which would make your crust soggy.
- Cream the cream cheese and sugars: In the bowl of your electric mixer fitted with the paddle attachment (or using a large bowl and a hand mixer), add the softened cream cheese, granulated sugar, and light brown sugar. Beat on medium-low speed for about 3-4 minutes, scraping down the sides of the bowl frequently with a rubber spatula, until the mixture is completely smooth, light, and fluffy with no visible lumps. It’s paramount that your cream cheese is very soft at this stage to achieve a truly smooth batter.
- Incorporate remaining wet ingredients: Add the room temperature sour cream, vanilla extract, and sea salt to the cream cheese mixture. Continue to beat on low speed until just combined, about 1 minute. Again, scrape down the sides and bottom of the bowl to ensure everything is evenly incorporated.
- Add the cookie butter: Gently fold in the smooth cookie butter. Mix on low speed, or by hand with a spatula, until the cookie butter is fully integrated into the cream cheese mixture, creating a uniform, caramel-colored batter. Be careful not to overmix here.
- Carefully add the eggs: Add the eggs one at a time, beating on the lowest speed possible just until each egg is incorporated. After each egg, stop the mixer and scrape down the sides of the bowl. Do not overmix once the eggs are added! Overmixing incorporates too much air, which can cause the cheesecake to crack during baking. The batter should be smooth and creamy, but not overly aerated.
- Pour the filling: Pour the prepared cheesecake filling over the cooled, pre-baked cookie crust in the foil-wrapped springform pan. Gently tap the pan on the counter a few times to release any large air bubbles that might be trapped within the batter. This helps ensure an even bake and a smooth top.
Phase 3: The Gentle Baking Process (and Water Bath!)
- Prepare the water bath: Place the foil-wrapped springform pan into a larger roasting pan or deep baking dish. Carefully pour hot (but not boiling) water into the larger pan, ensuring the water level comes about halfway up the sides of the springform pan. The water bath provides a moist, even heat, preventing the cheesecake from cracking and resulting in an incredibly creamy texture.
- Bake the cheesecake: Carefully transfer the roasting pan with the cheesecake and water bath into your preheated 325°F (160°C) oven. Bake for approximately 60-80 minutes. The baking time can vary depending on your oven.
- Check for doneness: To check for doneness, gently jiggle the pan. The edges of the cheesecake should appear set, but the very center (about a 2-3 inch diameter) should still have a slight wobble, like soft gelatin. It will continue to cook and set as it cools. Do not bake until the center is completely firm, as this will lead to a dry and cracked cheesecake.
- Start the cooling process (in the oven): Once the cheesecake reaches the desired doneness, turn off the oven, but leave the cheesecake inside the water bath with the oven door propped open slightly (using a wooden spoon or oven mitt). Let it cool in the gradually decreasing heat of the oven for 1 hour. This slow cooling process helps prevent drastic temperature changes that can cause cracks.
Phase 4: The Patient Cooling and Chilling Stage
- Remove from water bath and finish cooling: After 1 hour in the oven, carefully remove the springform pan from the water bath (be very cautious with hot water!) and unwrap the foil. Place the cheesecake on a wire rack to cool completely at room temperature for another 1-2 hours. It must be completely cool to the touch before chilling.
- The crucial chilling: Once cooled to room temperature, cover the springform pan loosely with plastic wrap. Transfer the cheesecake to the refrigerator and chill for a minimum of 6-8 hours, or ideally, overnight. This chilling period is absolutely essential for the cheesecake to firm up, develop its full flavor, and become sliceable. Do not rush this step!
- Prepare for serving: After chilling, run a thin knife around the inner edge of the springform pan before releasing and removing the ring. This helps prevent the edges from sticking and tearing. Your cheesecake is almost ready for its grand reveal!
Phase 5: Adding the Final Flourish – Cookie Butter Swirl
- Warm the cookie butter for the swirl: Gently warm the ½ cup of cookie butter in a microwave-safe bowl for 15-30 seconds, stirring until it becomes smooth and easily pourable. It should be fluid but not hot.
- Create the swirl: Drizzle the warmed cookie butter artistically over the top of the chilled cheesecake. You can create concentric circles, a zig-zag pattern, or random drizzles.
- Swirl it up (optional): For a more integrated swirl, use a skewer or a butter knife to gently drag through the drizzled cookie butter, creating elegant patterns. Be careful not to dig too deep into the cheesecake itself.
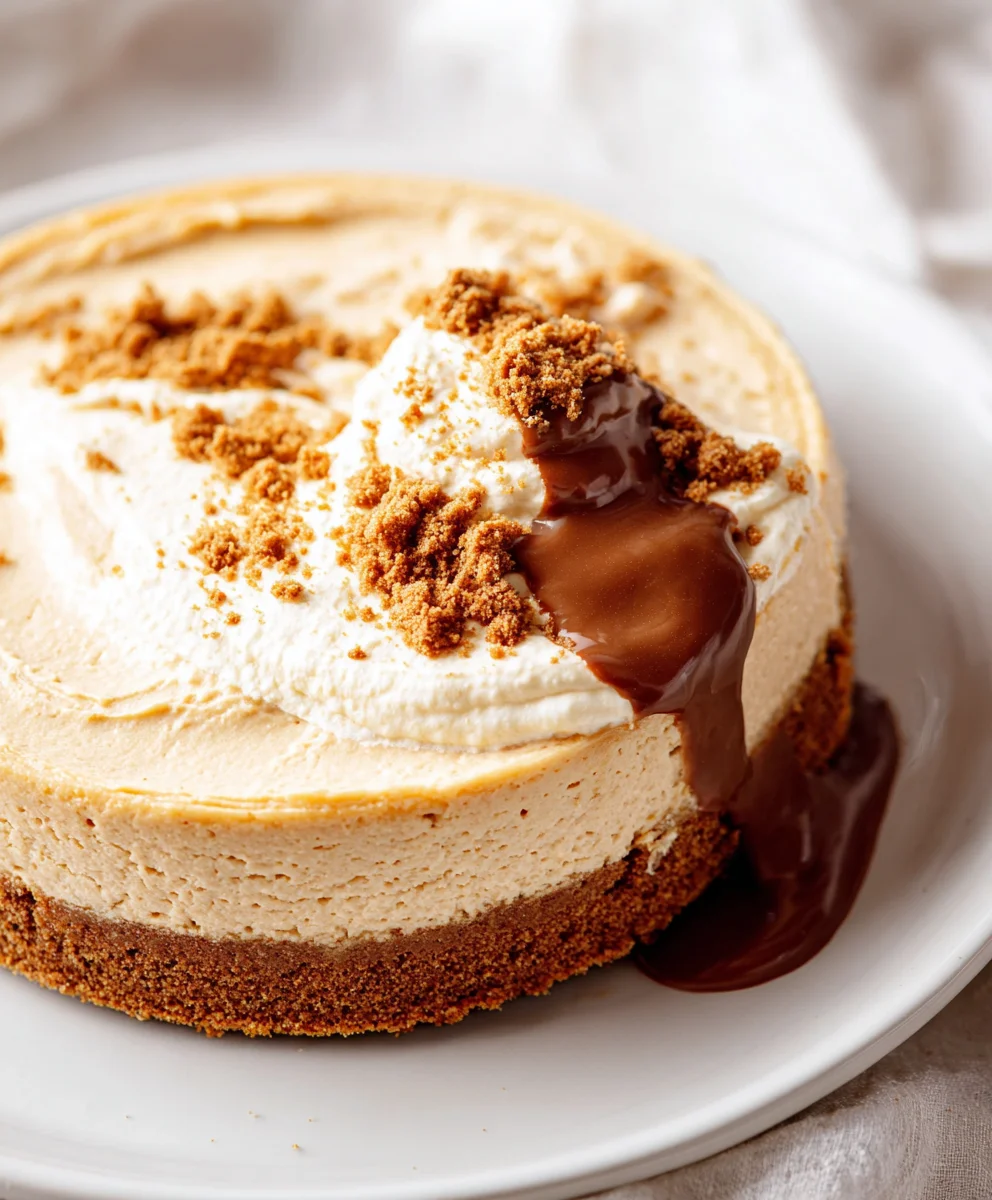
- Optional garnishes and final chill: If desired, sprinkle extra crushed Speculoos cookies around the edge or dollop with fresh whipped cream just before serving. Return the cheesecake to the refrigerator for another 15-30 minutes if the cookie butter swirl needs to set slightly.
- Slice and serve: For the cleanest slices, use a sharp knife dipped in hot water and wiped clean between each cut. This prevents sticking and ensures beautiful, smooth portions. Serve and enjoy your glorious homemade Cookie Butter Cheesecake! Leftovers can be stored, covered, in the refrigerator for up to 5 days.
Tips for Perfect Cookie Butter Cheesecake:
- Room Temperature is Key: I cannot stress this enough – ensure your cream cheese, sour cream, and eggs are at room temperature. This is the single most important factor for a lump-free, silky smooth cheesecake filling. Plan ahead!
- Don’t Overmix: Once you add the eggs, mix only until just combined on the lowest speed. Overmixing incorporates too much air, which can cause cracks during baking and a less dense, creamy texture.
- The Water Bath is Your Friend: While it might seem like an extra step, the water bath is essential for preventing cracks, ensuring even baking, and yielding that signature creamy, custardy texture. Make sure your foil wrap is secure!
- Cool Down Slowly: Drastic temperature changes are the enemy of a smooth, crack-free cheesecake. Cooling it slowly in the oven with the door propped open, then at room temperature, and finally in the refrigerator, is crucial.
- Patience with Chilling: The minimum 6-8 hour chill time, or preferably overnight, is non-negotiable. This allows the cheesecake to fully set, firm up, and for all the incredible flavors to meld together beautifully. Trust the process!
- Clean Slices: For bakery-worthy slices, always use a long, sharp knife. Dip it in hot water, wipe it clean, and make your cut. Repeat for each slice. This technique creates clean, defined edges and prevents the cheesecake from sticking to the knife.
- Experiment with Toppings: While the cookie butter swirl is divine, feel free to get creative! A dollop of whipped cream, a sprinkle of sea salt flakes, or a handful of fresh berries can add an extra layer of flavor and visual appeal.
Conclusion:
And there you have it, my friends – the full breakdown of what I truly believe is one of the most sublime desserts you’ll ever have the pleasure of creating and, more importantly, devouring. This isn’t just another cheesecake recipe; it’s an experience, a journey into a world of unparalleled indulgence that will leave everyone who tastes it utterly captivated. From the moment that first incredible aroma fills your kitchen, promising something truly special, you’ll understand why this Cookie Butter Cheesecake has earned a permanent, cherished spot in my heart and recipe collection. It’s the perfect harmony of spiced, crunchy crust meeting an impossibly smooth, rich, and utterly luxurious cookie butter filling, all culminating in a dessert that is both sophisticated and incredibly comforting.
What makes this particular recipe a definite must-try, you ask? It’s the seamless blend of textures and flavors. The buttery, spiced cookie base provides a delightful crunch that perfectly complements the velvety, melt-in-your-mouth creaminess of the filling. Every single bite is a symphony, with the distinctive taste of speculoos cookies shining through, not overpoweringly, but with a warm, inviting embrace that is simply irresistible. It’s elegant enough for a special occasion, yet surprisingly approachable for the home baker, making it the ideal showstopper dessert that doesn’t demand hours of complicated techniques. Trust me when I say, the effort is minimal compared to the awe-inspiring results, making it an excellent choice for both seasoned bakers and those looking to impress without the stress.
Now, let’s talk about enhancing this masterpiece. While perfect on its own, a few serving suggestions can elevate your Cookie Butter Cheesecake even further. I love serving it chilled to perfection, perhaps with a delicate dusting of cocoa powder or a very light drizzle of extra warmed cookie butter on top for an added layer of flavor and visual appeal. For a touch of freshness and a delightful tart contrast, a handful of fresh berries – raspberries or strawberries work beautifully – can brighten up each slice. Consider pairing it with a rich, dark coffee or a fragrant cup of spiced chai tea; the complementary notes will create an even more memorable dessert experience. For a truly decadent finish, a dollop of freshly whipped cream or a scoop of vanilla bean ice cream can turn a magnificent dessert into an unforgettable feast.
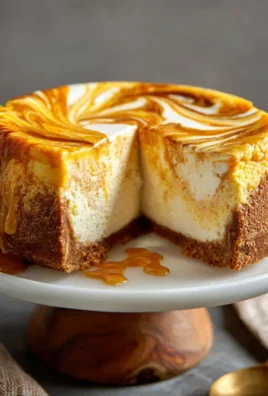
Feeling adventurous? This recipe is wonderfully adaptable, allowing for delightful variations. You could experiment with different cookie bases – a gingersnap crust would amplify the spice, or a plain shortbread for a more subtle foundation. For an extra layer of decadence, swirl in some melted dark chocolate into a portion of the cheesecake batter before baking, creating a beautiful marble effect and a delightful chocolate-cookie butter fusion. Alternatively, try adding a layer of homemade caramel or dulce de leche over the crust before adding the filling for an even richer profile. If you’re hosting a larger gathering or prefer individual portions, baking this as mini cheesecakes in cupcake liners is an adorable and convenient option. The possibilities are truly endless, limited only by your imagination, and each variation promises a new delightful twist on this already incredible dessert.
So, please, don’t just admire this recipe from afar – dive in and make it! I promise you, the joy of baking this Cookie Butter Cheesecake is matched only by the sheer delight of tasting it. It’s a rewarding process, and the aroma that permeates your home as it bakes is a treat in itself. Embrace the opportunity to create something truly spectacular for your loved ones, or simply to treat yourself to a moment of pure culinary bliss. Baking should be an enjoyable, fulfilling experience, and this recipe absolutely delivers on that front, yielding impressive results with straightforward steps. It’s a testament to how simple ingredients can come together to form something extraordinary.
I absolutely cannot wait to hear about your experience! Did you stick to the original recipe, or did you venture into some delicious variations? What did your family and friends think? Did it become an instant favorite in your home, just as it has in mine? Please share your thoughts, your successes, and even your creative adaptations in the comments below. I love seeing your creations and hearing your stories. Tag me in your photos if you post them online – let’s celebrate the joy of baking and the sheer deliciousness of this amazing Cookie Butter Cheesecake together. Happy baking, and happy indulging!
Creamy Cookie Butter Cheesecake
Cookie Butter Cheesecake is an experience waiting to unfold on your palate. Imagine the comforting warmth of spiced Speculoos cookies, their distinct caramelized notes and hint of cinnamon, ginger, and cloves, now lusciously blended into a creamy, decadent cheesecake. This delightful creation beautifully merges the beloved flavors of cookie butter with the irresistible tang and silkiness of a classic cheesecake, making it a perfect centerpiece for any occasion.
Ingredients
-
1 cup heavy cream, cold
-
1½ cups powdered sugar
-
1 cup cookie butter
-
8 ounces cream cheese, softened
-
1 pie crust
Instructions
-
Step 1
Preheat oven to 350°F (175°C). For a cookie crust, combine crushed Speculoos cookies, melted butter, and granulated sugar. Press firmly into the bottom of a 9-inch springform pan. Bake for 8-10 minutes until set, then remove and cool completely. Reduce oven temperature to 325°F (160°C) for the cheesecake baking process. -
Step 2
Ensure cream cheese, sour cream, and eggs are at room temperature. In an electric mixer, beat softened cream cheese with granulated sugar and light brown sugar until completely smooth and lump-free (3-4 minutes). Add sour cream, vanilla extract, and sea salt, beating on low until just combined. Gently fold in the smooth cookie butter until integrated. Add eggs one at a time, mixing on the lowest speed possible just until incorporated. Do not overmix. -
Step 3
Carefully wrap the exterior of the springform pan with multiple layers of heavy-duty aluminum foil to create a watertight barrier. Pour the prepared cheesecake filling over the cooled crust. Place the foil-wrapped springform pan into a larger roasting pan. Carefully pour hot water into the larger pan, ensuring the water level comes about halfway up the sides of the springform. Bake in the preheated 325°F (160°C) oven for approximately 60-80 minutes, until the edges are set but the center still has a slight wobble. -
Step 4
Once baked, turn off the oven, prop the door open slightly, and leave the cheesecake inside the water bath for 1 hour to cool slowly. After 1 hour, carefully remove the springform pan from the water bath and unwrap the foil. Place the cheesecake on a wire rack to cool completely at room temperature for another 1-2 hours until cool to the touch. -
Step 5
Once cooled to room temperature, cover the springform pan loosely with plastic wrap. Transfer the cheesecake to the refrigerator and chill for a minimum of 6-8 hours, or ideally overnight. This chilling period is crucial for the cheesecake to firm up, develop full flavor, and become sliceable. -
Step 6
After chilling, run a thin knife around the inner edge of the springform pan before releasing the ring. Gently warm ½ cup of cookie butter until easily pourable. Drizzle it artistically over the top of the chilled cheesecake, creating swirls if desired. Garnish with additional crushed Speculoos cookies or fresh whipped cream just before serving. For the cleanest slices, use a sharp knife dipped in hot water and wiped clean between each cut. Serve and enjoy!
Important Information
Nutrition Facts (Per Serving)
It is important to consider this information as approximate and not to use it as definitive health advice.
Allergy Information
Please check ingredients for potential allergens and consult a health professional if in doubt.
Leave a Comment