
Cutie Pie Mini Cakes – there’s something truly magical about a dessert that’s not only incredibly delicious but also perfectly portioned and undeniably charming. Forget the struggle of slicing a traditional pie or cake; imagine the delight on your guests’ faces when they each receive their very own, beautifully crafted treat, promising an explosion of flavor in every bite.
While the concept of individual desserts isn’t new, these delightful mini cakes represent a modern evolution, blending the comforting essence of a classic pie with the elegant presentation of a personal cake. They speak to a desire for both nostalgia and unparalleled convenience, allowing us to savor all the beloved flavors and textures of a larger dessert without any of the fuss.
Why Everyone Adore These Cutie Pie Mini Cakes
What makes these Cutie Pie Mini Cakes so universally adored? It’s a symphony of textures and tastes. Picture a tender, buttery crust or a soft, moist cake exterior cradling a luscious, fruit-filled, or creamy center. Each bite offers a perfect balance – that satisfying crumble or sponge, followed by the rich burst of filling that tantalizes the palate. They’re incredibly versatile, adapting beautifully to any season or occasion, making them the ultimate crowd-pleaser. Beyond their exquisite taste, their single-serving nature ensures everyone gets a perfect slice, making them ideal for parties, potlucks, or simply a luxurious personal indulgence. I find immense joy in creating these miniature masterpieces, knowing they bring a smile to every face.

Ingredients:
- For the Cutie Pie Mini Cake Bases:
- 1 ½ cups (180g) all-purpose flour, sifted – Sifting is key for a light and airy texture in our “Cutie Pie Mini Cakes.”
- 1 ½ teaspoons baking powder – This will give our mini cakes that wonderful lift.
- ½ teaspoon salt – Just a pinch to balance the sweetness and enhance all the flavors.
- ½ cup (113g) unsalted butter, softened to room temperature – I always make sure my butter is perfectly soft for creaming, it makes a huge difference.
- 1 cup (200g) granulated sugar – For that essential sweetness in our delicious “Cutie Pie Mini Cakes.”
- 2 large eggs, at room temperature – Room temperature eggs emulsify better with the butter and sugar, leading to a smoother batter.
- 1 teaspoon vanilla extract – Use a good quality extract; it truly elevates the flavor of these little treats.
- ½ cup (120ml) whole milk, at room temperature – Again, room temperature helps everything combine seamlessly.
- For the Luscious Berry Filling:
- 2 cups (approx. 300g) mixed berries (fresh or frozen, thawed) – Strawberries, raspberries, blueberries, blackberries – whatever your heart desires for these “Cutie Pie Mini Cakes”!
- ¼ cup (50g) granulated sugar (or more, to taste) – Adjust based on the sweetness of your berries.
- 1 tablespoon fresh lemon juice – A little acidity brightens the berry flavor beautifully.
- 1 tablespoon cornstarch – This helps thicken our filling to the perfect consistency.
- 2 tablespoons cold water – To create a slurry with the cornstarch.
- For the Dreamy Vanilla Glaze:
- 1 ½ cups (180g) powdered sugar (confectioners’ sugar), sifted – Sifting prevents lumps and gives you a wonderfully smooth glaze.
- 2-3 tablespoons whole milk or cream – Start with 2 tablespoons and add more a tiny bit at a time until you reach your desired consistency.
- ½ teaspoon vanilla extract – More vanilla, because you can never have enough!
- Optional Garnish:
- Fresh berries
- Mint leaves
Equipment You’ll Need:
Before we dive into creating these delightful “Cutie Pie Mini Cakes,” let’s ensure we have all our essential tools ready. Having everything prepped makes the baking process so much more enjoyable and efficient!
- Muffin tin or mini cake pan (a 12-cup standard muffin tin or a mini bundt cake pan works wonderfully)
- Paper liners (if using a standard muffin tin)
- Mixing bowls (at least two: one large, one medium)
- Electric mixer (stand mixer with paddle attachment or handheld mixer)
- Whisk
- Rubber spatula
- Measuring cups and spoons
- Small saucepan
- Wire cooling rack
- Small bowl for glaze
- Pastry brush or spoon for glazing
Phase 1: Crafting Your Cutie Pie Mini Cake Bases
This is where the magic begins for our “Cutie Pie Mini Cakes”! A perfect cake base is the foundation for an extraordinary dessert. Take your time with each step; it truly pays off in the final texture.
- Preheat and Prepare: First things first, I always preheat my oven to 350°F (175°C). Then, I either lightly grease and flour my mini cake pan, or if I’m using a muffin tin, I line it with paper liners. This ensures our precious “Cutie Pie Mini Cakes” pop out beautifully.
- Combine Dry Ingredients: In a medium bowl, I like to whisk together the sifted all-purpose flour, baking powder, and salt. Make sure these are well combined. This step evenly distributes the leavening agents, which is crucial for a consistent rise in our “Cutie Pie Mini Cakes.” Set this aside for now.
- Cream Butter and Sugar: In a large mixing bowl, using an electric mixer (either a stand mixer with the paddle attachment or a handheld mixer), I cream together the softened unsalted butter and granulated sugar on medium speed. This process should take about 3-5 minutes, until the mixture is light, fluffy, and pale yellow. This creaming process is vital for incorporating air into the batter, which contributes to the lightness of our “Cutie Pie Mini Cakes.” Don’t rush this step!
- Add Eggs Gradually: Once the butter and sugar are perfectly creamy, I add the large eggs, one at a time, beating well after each addition. It’s important to scrape down the sides of the bowl frequently with a rubber spatula to ensure everything is fully incorporated. The mixture might look a little curdled at first, but keep beating, and it will smooth out.
- Introduce Vanilla: After the eggs are fully incorporated, I mix in the vanilla extract. The aroma is already starting to build, hinting at the deliciousness to come!
- Alternate Dry and Wet Ingredients: Now, we’ll alternately add the dry ingredient mixture and the milk to the wet ingredients. I start by adding about one-third of the dry ingredients to the butter mixture, mixing on low speed just until combined. Then, I pour in half of the milk, mixing again until just combined. I repeat this process, finishing with the last third of the dry ingredients. It’s really important here not to overmix the batter. Overmixing can develop the gluten in the flour too much, leading to tough “Cutie Pie Mini Cakes” – and we definitely want them tender! Mix only until no streaks of flour remain. A few small lumps are okay.
Phase 2: Baking Those Adorable Mini Cakes
Now that our glorious batter for the “Cutie Pie Mini Cakes” is ready, it’s time to bring them to life in the oven! Proper baking ensures they are perfectly golden and cooked through.
- Fill the Pans: I carefully spoon the batter into the prepared muffin tin or mini cake pan, filling each cup about two-thirds full. For uniform “Cutie Pie Mini Cakes,” I often use an ice cream scoop, which makes portioning super easy and mess-free.
- Bake to Perfection: Transfer the pan to the preheated oven. Bake for 18-22 minutes, or until a wooden skewer or toothpick inserted into the center of a mini cake comes out clean. Baking times can vary slightly depending on your oven and the size of your mini cakes, so keep an eye on them. The tops should be lightly golden brown.
- Cool Down: Once baked, I remove the pan from the oven and let the “Cutie Pie Mini Cakes” cool in the pan for about 5-10 minutes. This allows them to set up a bit before handling. Then, I carefully transfer them to a wire cooling rack to cool completely. It’s crucial that the cakes are entirely cool before we add any filling or glaze, otherwise, everything will melt and slide off!
Phase 3: Whipping Up the Luscious Berry Filling
A “Cutie Pie Mini Cake” wouldn’t be complete without a vibrant, fruity center! This berry filling is simple to make and adds a delightful burst of flavor and color.
- Combine Berry Ingredients: In a small saucepan, I combine the mixed berries, granulated sugar, and fresh lemon juice.
- Cook the Berries: I place the saucepan over medium heat and bring the mixture to a gentle simmer, stirring occasionally. The berries will start to break down and release their juices. I let it simmer for about 5-7 minutes, until the berries are soft and the mixture is juicy.
- Prepare Cornstarch Slurry: While the berries are simmering, in a small separate bowl, I whisk together the cornstarch and cold water until no lumps remain. This is called a slurry, and it’s how we’ll thicken our filling.
- Thicken the Filling: Once the berries have simmered and softened, I pour the cornstarch slurry into the simmering berry mixture, stirring constantly. The mixture will almost immediately start to thicken. I continue to cook and stir for another 1-2 minutes, until the filling has reached a nice, thick, glossy consistency. We want it thick enough to stay put inside our “Cutie Pie Mini Cakes,” not runny!
- Cool the Filling: Remove the saucepan from the heat and transfer the berry filling to a clean bowl. Let it cool completely to room temperature. You can even pop it in the refrigerator to speed up the cooling process. A chilled filling is much easier to work with.
Phase 4: Preparing the Dreamy Vanilla Glaze
This simple vanilla glaze provides the perfect sweet finish and a lovely shine to our “Cutie Pie Mini Cakes.” It’s incredibly easy to make and tastes divine!
- Combine Glaze Ingredients: In a small bowl, I combine the sifted powdered sugar, 2 tablespoons of whole milk or cream, and the vanilla extract.
- Whisk to Smoothness: I whisk everything together thoroughly until the mixture is completely smooth and free of any lumps.
- Adjust Consistency: If the glaze is too thick, I add the remaining milk or cream a tiny bit at a time (like half a teaspoon) until I reach my desired pouring consistency. I’m looking for a glaze that is thick enough to coat the back of a spoon but still thin enough to drip appealingly down the sides of the “Cutie Pie Mini Cakes.” If, by chance, it becomes too thin, simply whisk in a little more sifted powdered sugar.
Phase 5: Assembling Your Perfect Cutie Pie Mini Cakes
This is my favorite part! Bringing all the components together to create these adorable and delicious “Cutie Pie Mini Cakes.” Get ready for some creative fun!
- Hollow Out the Cakes: Once the “Cutie Pie Mini Cakes” are completely cool, I gently use a small paring knife or a melon baller to carefully scoop out a small cavity from the center of each mini cake. I make sure not to go all the way through to the bottom. This creates the perfect little pocket for our berry filling. Don’t discard the scooped-out cake pieces; you can snack on them or crumble them over ice cream!
- Fill with Berries: Now, I spoon a generous amount of the cooled berry filling into each hollowed-out “Cutie Pie Mini Cake” cavity. I try to fill them just to the top, creating a lovely little dome of fruit.
- Glaze Them Up: With the berry filling in place, it’s time for the glaze! I gently drizzle or spoon the vanilla glaze over the top of each “Cutie Pie Mini Cake,” allowing it to cascade down the sides. You can use a spoon for a rustic look or a pastry brush for a more even coating.
- Garnish and Serve: For an extra touch of elegance and freshness, I often garnish my “Cutie Pie Mini Cakes” with a fresh berry or two and a small mint leaf. This adds visual appeal and a lovely aroma.
- Set and Enjoy: Allow the glaze to set for about 10-15 minutes at room temperature, or pop them in the fridge for a quick set if you’re in a hurry. Then, these delightful “Cutie Pie Mini Cakes” are ready to be served and devoured!
Tips for Perfect Cutie Pie Mini Cakes:
- Room Temperature Ingredients are Key: I cannot stress this enough! For the best emulsion and smoothest batter, make sure your butter, eggs, and milk are all at room temperature. This helps prevent a curdled batter and ensures a tender crumb for your “Cutie Pie Mini Cakes.”
- Don’t Overmix: As mentioned in the steps, mixing the batter too much after adding the flour can lead to tough cakes. Mix only until the ingredients are just combined.
- Cool Completely: Patience is a virtue, especially when baking! Ensure your “Cutie Pie Mini Cakes” are fully cooled before hollowing and filling. Warm cakes will absorb the filling and melt the glaze, leading to a messy, less appealing result.
- Adjust Sweetness: Taste your berry filling before you add the cornstarch. If your berries are tart, you might want to add a little more sugar to the filling.
- Storage: These “Cutie Pie Mini Cakes” are best enjoyed the day they are made. If you have leftovers, store them in an airtight container at room temperature for up to 2 days, or in the refrigerator for up to 4 days, especially if it’s warm in your kitchen or your filling is particularly juicy.
- Uniformity: For professional-looking “Cutie Pie Mini Cakes,” use an ice cream scoop to portion your batter and a consistent method for hollowing out the centers.
Flavor Variations to Inspire You:
While these “Cutie Pie Mini Cakes” are absolutely delicious as written, don’t be afraid to experiment with different flavor combinations to make them truly your own! Here are a few ideas I love:
- Lemon Zest Infusion: Add 1-2 tablespoons of fresh lemon zest to your cake batter for a bright, citrusy twist. This pairs beautifully with the berry filling.
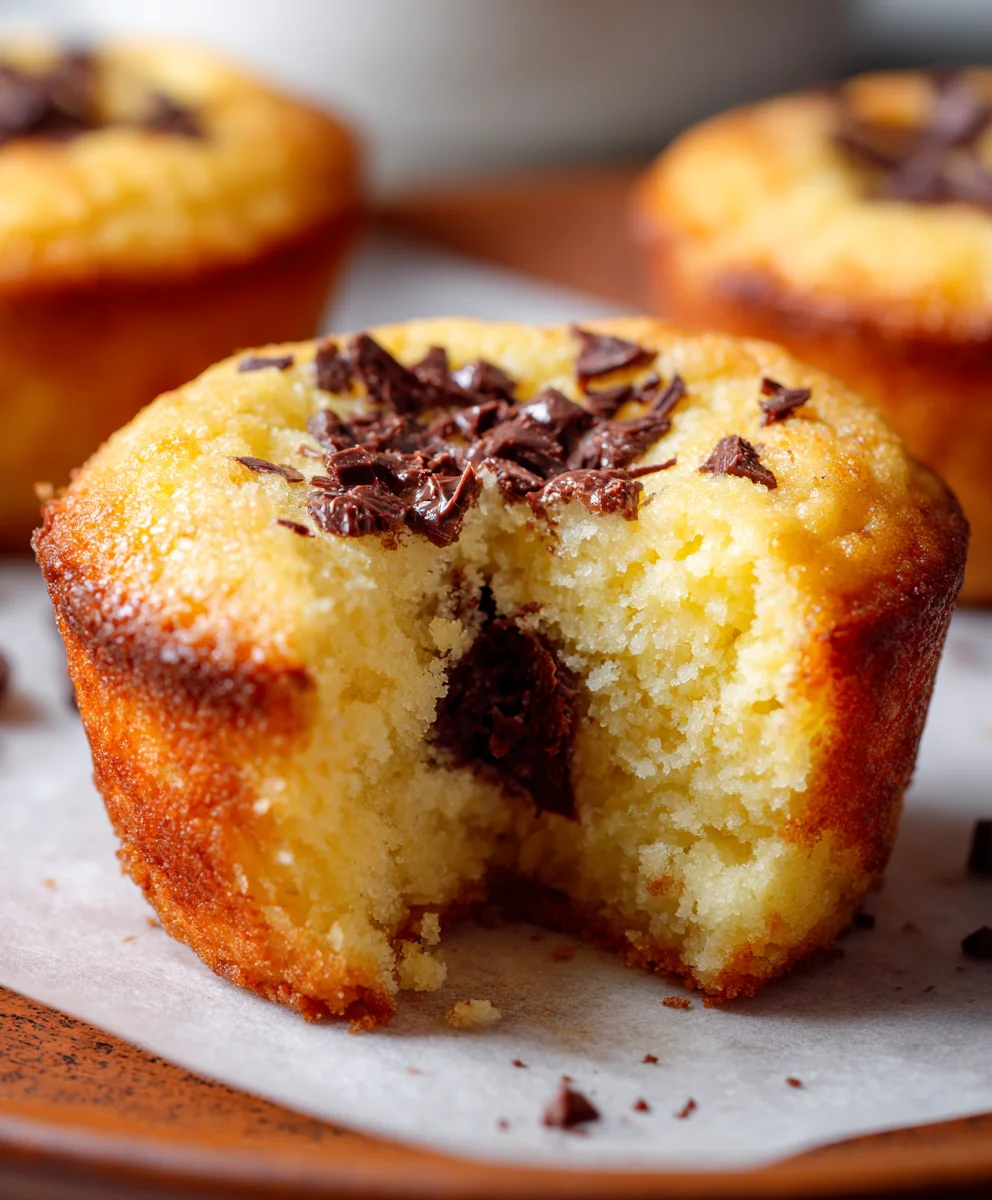
- Chocolate Chip Surprise: Fold ½ cup of mini chocolate chips into the cake batter for a delightful chocolatey surprise in every bite of your “Cutie Pie Mini Cakes.”
- Different Fillings: Instead of mixed berries, consider a cherry pie filling, apple cinnamon compote, or even a lemon curd for a completely different flavor profile. Just make sure whatever filling you choose is thick enough to hold its shape.
- Cream Cheese Glaze: For a richer topping, you could make a simple cream cheese glaze instead of the vanilla glaze. Combine 4 oz softened cream cheese, ½ cup softened unsalted butter, 2 cups powdered sugar, and 1 tsp vanilla extract, beating until fluffy.
- Spiced Cakes: Add ½ teaspoon of cinnamon or a pinch of nutmeg to the dry ingredients for a warmer, cozier flavor, especially if you’re using an apple or peach filling.
I hope you enjoy making these “Cutie Pie Mini Cakes” as much as I do. They’re perfect for parties, brunches, or just a special treat for yourself!
Conclusion:
Well, my friends, we’ve reached the sweet end of our journey with this incredible recipe, and I truly hope you’re feeling as inspired as I am to get baking! If there’s one recipe I can urge you to try, it’s this one. Why is it a must-try, you ask? Because these aren’t just any ordinary desserts; they are truly exceptional. They strike that perfect balance between being incredibly simple to make and delivering an absolutely show-stopping result. Forget complicated techniques or hours spent slaving in the kitchen. This recipe empowers even the most novice baker to create something that looks and tastes like it came straight from a gourmet patisserie.
The sheer delight that comes from presenting a platter of these perfectly portioned, charmingly sized treats is unparalleled. They are inherently joyful, offering a bite-sized escape that is neither too heavy nor too small. Each one is a little masterpiece, a testament to simple elegance and delicious flavor. Imagine the smiles when you serve these up – they’re guaranteed to be the star of any gathering, from casual coffee mornings with friends to elegant afternoon teas. I promise you, the effort-to-reward ratio here is off the charts. You’ll invest minimal time and energy but reap maximum compliments and pure satisfaction. These little gems are designed to bring joy and make your baking adventures feel incredibly rewarding. They’re more than just a dessert; they’re an experience, a delightful moment of indulgence that feels both special and accessible.
Serving Suggestions & Creative Variations:
Now that you’re convinced these are a must-bake, let’s talk about making them truly your own! While absolutely perfect as they are, there are countless ways to elevate and customize these delightful morsels. For a simple yet elegant presentation, arrange your finished cakes on a tiered stand or a beautiful serving platter, perhaps garnished with a scattering of fresh berries like raspberries or blueberries, or a light dusting of confectioners’ sugar. They pair wonderfully with a warm cup of coffee, a soothing herbal tea, or even a glass of sparkling wine for a more festive occasion. They are also ideal for children’s parties, baby showers, or bridal brunches, offering a sophisticated yet fun dessert option that’s easy for guests to enjoy.
Want to get creative? Oh, the possibilities!
- Flavor Boosts: Experiment with extracts! Instead of vanilla, try almond extract for a marzipan-like nuance, lemon extract for a zesty zing, or even a hint of peppermint extract during the holidays. You could also fold in finely grated citrus zest – orange, lemon, or lime – into the batter for an extra layer of brightness.
- Mix-Ins: Elevate the texture and taste by gently folding in a handful of mini chocolate chips, finely chopped nuts (like pecans or walnuts), or even a tablespoon or two of fruit purée (like raspberry or apricot) swirled into the batter just before baking.
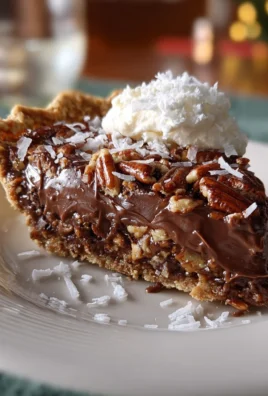
- Glorious Glazes & Frostings: The beauty of these cakes lies in their versatility. While a simple dusting of sugar is lovely, you could whip up a quick lemon glaze (powdered sugar, lemon juice, and a tiny bit of milk), a rich chocolate ganache drizzle, or a decadent cream cheese frosting. For a truly professional finish, try a light Swiss meringue buttercream in various pastel colors. Don’t forget the sprinkles! A generous shower of colorful sprinkles or edible glitter can transform them into truly festive treats.
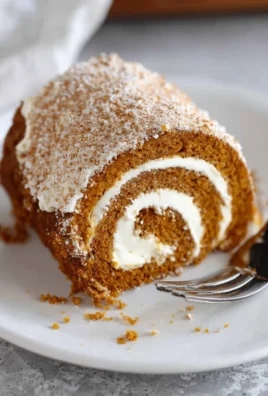
- Seasonal Sensations: Adapt the recipe to the season! In the fall, think a pinch of cinnamon and nutmeg in the batter with a maple glaze. For winter, incorporate a touch of ginger and serve with candied orange peel. The adaptability of these Cutie Pie Mini Cakes truly knows no bounds.
Your Turn to Bake and Share!
So, what are you waiting for? I wholeheartedly encourage you to roll up your sleeves, preheat your oven, and embark on this delightful baking adventure. You’re not just making a dessert; you’re creating moments of joy and delicious memories. This recipe is designed to be accessible, enjoyable, and incredibly rewarding, from the first step of mixing to that final, satisfying bite. Don’t be shy; embrace the process and allow yourself to be charmed by the simplicity and elegance of these treats.
Once you’ve experienced the magic yourself, I would absolutely love to hear about it! Please, share your baking triumphs, your creative variations, and your serving suggestions with me. Did you use a special frosting? Add a unique mix-in? Serve them at a memorable occasion? Tag me on social media, leave a comment below, or send me an email. Your stories and photos inspire not only me but also our entire community of fellow bakers. Let’s celebrate these little sweet victories together! Happy baking, everyone – I can’t wait to see what amazing creations you conjure up!
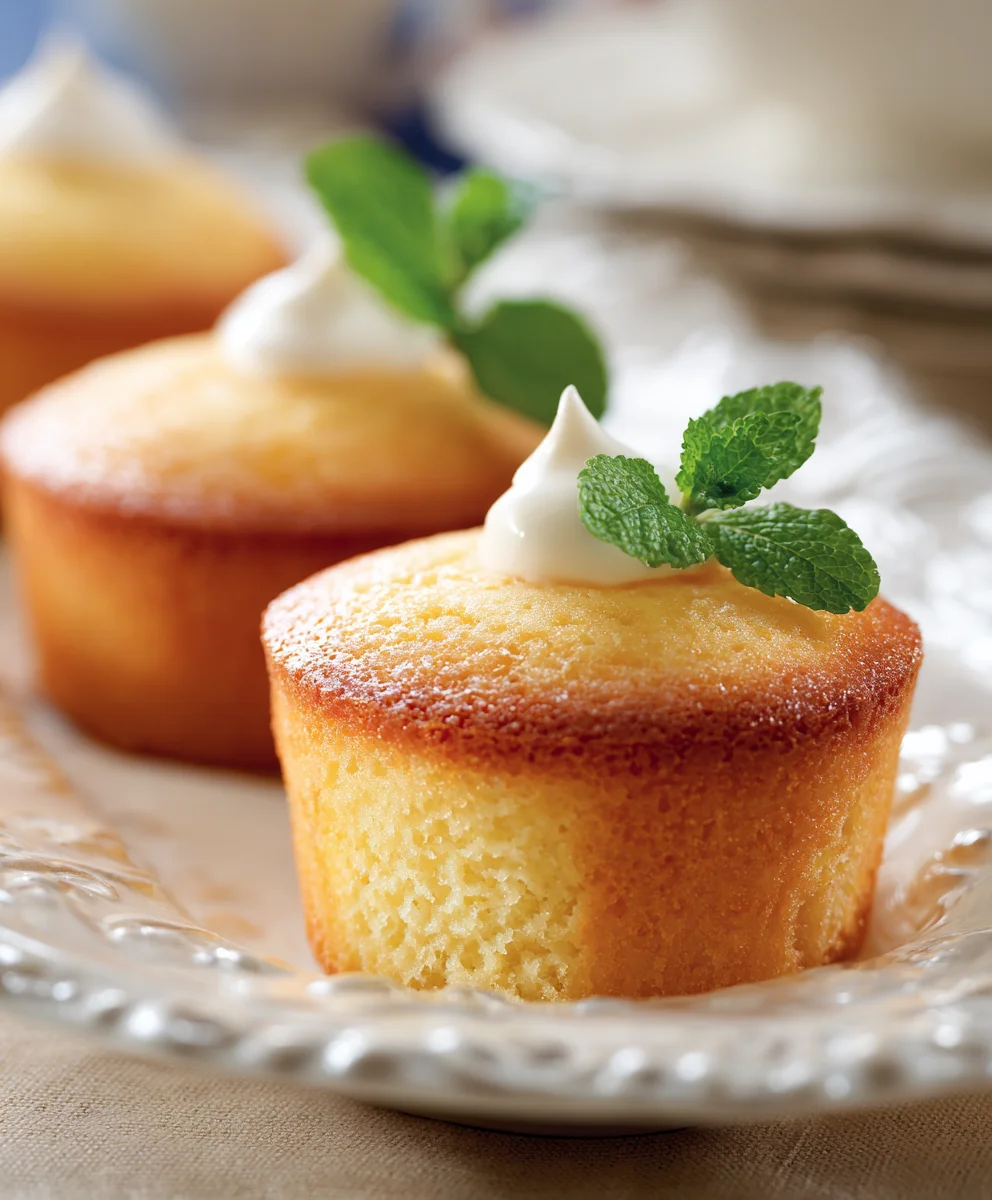
Cutie Pie Mini Cakes
Adorable, easy, and delicious individual mini cakes that beautifully blend the comforting essence of a classic pie with the elegant presentation of a personal cake. Featuring a tender cake base, a luscious mixed berry filling, and a dreamy vanilla glaze, these perfectly portioned treats are ideal for any occasion.
Ingredients
-
1 ½ cups (180g) all-purpose flour
-
1 ½ teaspoons baking powder
-
½ teaspoon salt
-
½ cup (113g) unsalted butter, softened
-
1 cup (200g) granulated sugar
-
2 large eggs, room temperature
-
1 teaspoon vanilla extract
-
½ cup (120ml) whole milk, room temperature
-
2 cups (approx. 300g) mixed berries (fresh or frozen, thawed)
-
¼ cup (50g) granulated sugar (for filling)
-
1 tablespoon fresh lemon juice
-
1 tablespoon cornstarch
-
2 tablespoons cold water
-
1 ½ cups (180g) powdered sugar, sifted
-
2-3 tablespoons whole milk or cream (for glaze)
-
½ teaspoon vanilla extract (for glaze)
-
Fresh berries (optional garnish)
-
Mint leaves (optional garnish)
Instructions
-
Step 1
Preheat oven to 350°F (175°C). Grease and flour a mini cake pan or line a 12-cup muffin tin. In a medium bowl, whisk together the all-purpose flour, baking powder, and salt. Set aside. -
Step 2
In a large mixing bowl, cream the softened unsalted butter and 1 cup granulated sugar on medium speed for 3-5 minutes until light and fluffy. Add the large eggs, one at a time, beating well after each. Mix in 1 teaspoon vanilla extract. -
Step 3
Alternately add the dry ingredient mixture (in thirds) and the ½ cup whole milk (in halves) to the wet ingredients, mixing on low speed just until combined. Do not overmix; mix only until no streaks of flour remain. -
Step 4
Carefully spoon the batter into the prepared pan, filling each cup about two-thirds full. Bake for 18-22 minutes, or until a wooden skewer or toothpick inserted into the center of a mini cake comes out clean. Let cool in the pan for 5-10 minutes, then transfer to a wire cooling rack to cool completely. -
Step 5
In a small saucepan, combine the mixed berries, ¼ cup granulated sugar, and fresh lemon juice. Bring to a gentle simmer over medium heat for 5-7 minutes, stirring, until berries soften. In a separate small bowl, whisk 1 tablespoon cornstarch and 2 tablespoons cold water to create a slurry. Pour the slurry into the simmering berry mixture, stirring constantly, and cook for another 1-2 minutes until the filling has reached a thick, glossy consistency. Transfer to a clean bowl and let cool completely (refrigerating can speed this up). -
Step 6
In a small bowl, combine the sifted powdered sugar, 2-3 tablespoons whole milk or cream, and ½ teaspoon vanilla extract. Whisk thoroughly until the mixture is completely smooth and free of lumps. Adjust consistency by adding more milk/cream (half a teaspoon at a time) if too thick, or a little more sifted powdered sugar if too thin. -
Step 7
Once the mini cakes are completely cool, gently use a small paring knife or a melon baller to carefully scoop out a small cavity from the center of each mini cake, ensuring not to go all the way through to the bottom. Spoon a generous amount of the cooled berry filling into each hollowed-out cavity. -
Step 8
Gently drizzle or spoon the vanilla glaze over the top of each filled mini cake, allowing it to cascade down the sides. For an extra touch, garnish with a fresh berry or two and a small mint leaf, if desired. Allow the glaze to set for about 10-15 minutes at room temperature (or briefly in the fridge) before serving. Enjoy your adorable and delicious Cutie Pie Mini Cakes!
Important Information
Nutrition Facts (Per Serving)
It is important to consider this information as approximate and not to use it as definitive health advice.
Allergy Information
Please check ingredients for potential allergens and consult a health professional if in doubt.

Leave a Comment