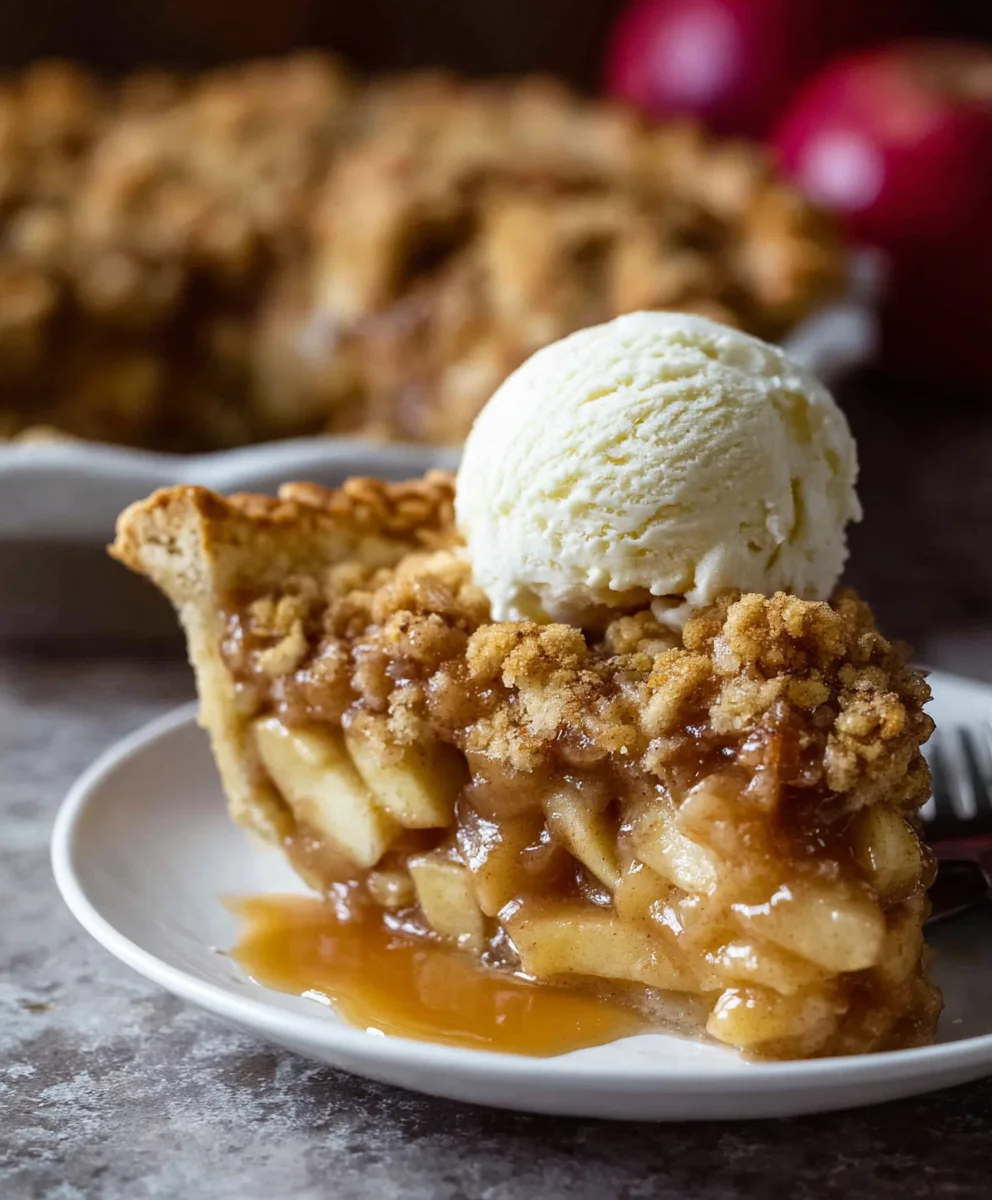
Sweet Dutch Apple Pie is more than just a dessert; it’s a warm hug in every single slice, promising comfort and joy with each mouthful. From the moment the intoxicating aroma of cinnamon, nutmeg, and baking apples fills your kitchen, you know you’re in for an unforgettable treat. I find there’s something truly magical about the humble apple transforming into such a beloved classic. This pie, with its distinctive crumbly topping, holds a special place in culinary history, often gracing tables in the Netherlands for centuries as a testament to simple, delicious baking that has transcended generations. It’s a dish that embodies tradition and heartwarming delight, perfect for any season, any gathering. People absolutely adore this particular variation because it strikes an exquisite balance: the tender, perfectly spiced apple filling offers just the right amount of sweetness, beautifully complemented by a hint of tartness. All of this is magnificently crowned with a buttery, golden streusel that adds an irresistible textural contrast. You’ll understand why the Sweet Dutch Apple Pie continues to be a perennial crowd-pleaser and a cherished staple in so many homes once you take that first glorious bite.

Ingredients:
Oh, I am just thrilled to share my absolute favorite Sweet Dutch Apple Pie recipe with you today! This isn’t just any apple pie; it’s a symphony of tender, spiced apples nestled under a delightful, buttery crumb topping, all encased in a flaky, golden crust. It’s the kind of pie that makes your house smell like a dream and brings everyone running to the kitchen. Get ready to bake a masterpiece!
-
For the Flaky Pie Crust (Bottom Crust Only):
- All-Purpose Flour: 1 ¼ cups (about 150 grams). I always recommend using a good quality unbleached all-purpose flour for the best texture.
- Granulated Sugar: 1 tablespoon. Just a touch to sweeten the crust and help with browning.
- Salt: ½ teaspoon. Essential for flavor balance, don’t skip it!
- Unsalted Butter: ½ cup (1 stick or 113 grams), very cold and cut into ½-inch cubes. The colder the butter, the flakier your crust will be. I often pop it in the freezer for 10-15 minutes before I start.
- Ice Water: 4-6 tablespoons. The ice is key here; it keeps the butter from melting too quickly.
-
For the Luscious Apple Filling:
- Apples: 6-8 medium-sized apples (about 2 ½ – 3 pounds total). For a truly magnificent Sweet Dutch Apple Pie, I love using a mix of sweet and tart apples. My go-to combination is Granny Smith for tartness and Honeycrisp or Fuji for sweetness and texture. They hold their shape beautifully!
- Granulated Sugar: ½ cup. Adjust this amount based on the sweetness of your apples and your personal preference.
- Light Brown Sugar: ¼ cup, packed. This adds a lovely molasses note and depth of flavor.
- All-Purpose Flour: ¼ cup. This acts as our thickener, ensuring a perfectly set filling.
- Ground Cinnamon: 1 ½ teaspoons. Warm and inviting, it’s the heart of apple pie spice.
- Ground Nutmeg: ½ teaspoon. Freshly grated, if you can, it makes a huge difference!
- Ground Allspice: ¼ teaspoon. A little touch for complexity.
- Lemon Juice: 1 tablespoon. Brightens the flavors and prevents the apples from browning.
- Unsalted Butter: 2 tablespoons, melted. A little richness never hurt anyone!
-
For the Irresistible Crumb Topping (Streusel):
- All-Purpose Flour: 1 cup (about 120 grams).
- Light Brown Sugar: ½ cup, packed. For that classic caramel-like sweetness.
- Granulated Sugar: ¼ cup.
- Ground Cinnamon: ½ teaspoon. Enhances the apple flavors beautifully.
- Salt: ¼ teaspoon. Balances the sweetness.
- Unsalted Butter: ½ cup (1 stick or 113 grams), very cold and cut into ½-inch cubes. Just like with the crust, cold butter is your best friend here for that delightful crumbly texture.
-
Tools You’ll Need:
- 9-inch pie plate
- Large mixing bowls (at least 3)
- Pastry blender or food processor (for the crust and topping)
- Rolling pin
- Vegetable peeler and apple corer
- Measuring cups and spoons
- Wire rack for cooling
Crafting the Perfect Pie Crust
First things first, let’s get that glorious pie crust ready. A good crust is the foundation of any fantastic pie, and I promise you, making it from scratch is incredibly rewarding.
- Combine Dry Ingredients: In a large mixing bowl, whisk together the 1 ¼ cups of all-purpose flour, 1 tablespoon of granulated sugar, and ½ teaspoon of salt. Make sure it’s all nicely combined before moving on.
- Cut in the Butter: Now for the magic! Add your ½ cup of very cold, cubed unsalted butter to the dry ingredients. Using a pastry blender, two knives, or even your fingertips (work quickly to keep the butter cold!), cut the butter into the flour mixture until it resembles coarse meal with some pea-sized pieces of butter remaining. This step is crucial for flakiness! Don’t overmix; you want those distinct butter pieces. If you have a food processor, you can pulse the butter and flour together for about 10-15 seconds until the desired texture is achieved.
- Add Ice Water: Gradually add the ice water, 1 tablespoon at a time, mixing lightly with a fork after each addition. I usually start with 4 tablespoons and add more only if absolutely necessary. You’re looking for the dough to just come together when pinched between your fingers. It should be moist enough to hold its shape but not sticky or wet.
- Form and Chill: Gently gather the dough into a disc. Try not to knead it too much, as overworking develops the gluten and can lead to a tough crust. Wrap the disc tightly in plastic wrap and refrigerate it for at least 30 minutes, or up to 2 days. Chilling the dough allows the gluten to relax and the butter to firm up, making it easier to roll and ensuring a tender crust.
- Roll out the Crust: When you’re ready to bake, remove the dough from the refrigerator and let it sit at room temperature for about 5-10 minutes to soften slightly, making it easier to roll. On a lightly floured surface, roll the dough into a 12-inch circle, about ⅛-inch thick. Periodically lift and rotate the dough to prevent sticking and ensure an even shape.
- Transfer to Pie Plate: Carefully transfer the rolled-out dough to your 9-inch pie plate. You can do this by gently rolling it over your rolling pin and unrolling it into the plate, or by folding it in quarters and unfolding it. Fit the dough snugly into the plate, pressing it against the bottom and sides without stretching it.
- Trim and Crimp: Trim the edges of the dough, leaving about a ½-inch overhang. Fold this overhang under itself, creating a thicker edge. Now, you can crimp the edges decoratively using your fingers or a fork. I love a classic fluted edge!
- Chill Again: Place the prepared pie crust back into the refrigerator while you prepare the filling. This helps prevent shrinkage during baking.
Preparing the Aromatic Apple Filling
Ah, the heart of our Sweet Dutch Apple Pie! The filling needs to be perfectly balanced in sweetness, spice, and texture. This is where those mixed apples truly shine.
- Prepare the Apples: First, peel, core, and slice your 6-8 medium apples. I like to slice them about ¼-inch thick. This ensures they cook evenly and retain a bit of texture without becoming mushy. Place all the sliced apples into a very large mixing bowl.
- Add the Wet Ingredients: Drizzle the 1 tablespoon of lemon juice and 2 tablespoons of melted unsalted butter over the apples. Toss gently to coat. The lemon juice helps prevent browning and adds a lovely bright note that cuts through the richness.
- Combine Dry Filling Ingredients: In a separate medium bowl, whisk together the ½ cup granulated sugar, ¼ cup packed light brown sugar, ¼ cup all-purpose flour, 1 ½ teaspoons ground cinnamon, ½ teaspoon ground nutmeg, and ¼ teaspoon ground allspice. Make sure there are no lumps, especially from the brown sugar.
- Toss Apples with Spices: Pour the dry spice mixture over the apples in the large bowl. Using a large spoon or your clean hands, gently toss the apples until they are evenly coated with the sugar and spice mixture. You’ll notice the apples will start to release some of their juices as they sit with the sugar. This is perfectly normal and desired! Let them sit for a few minutes while you make the crumb topping.
Crafting the Delightful Crumb Topping
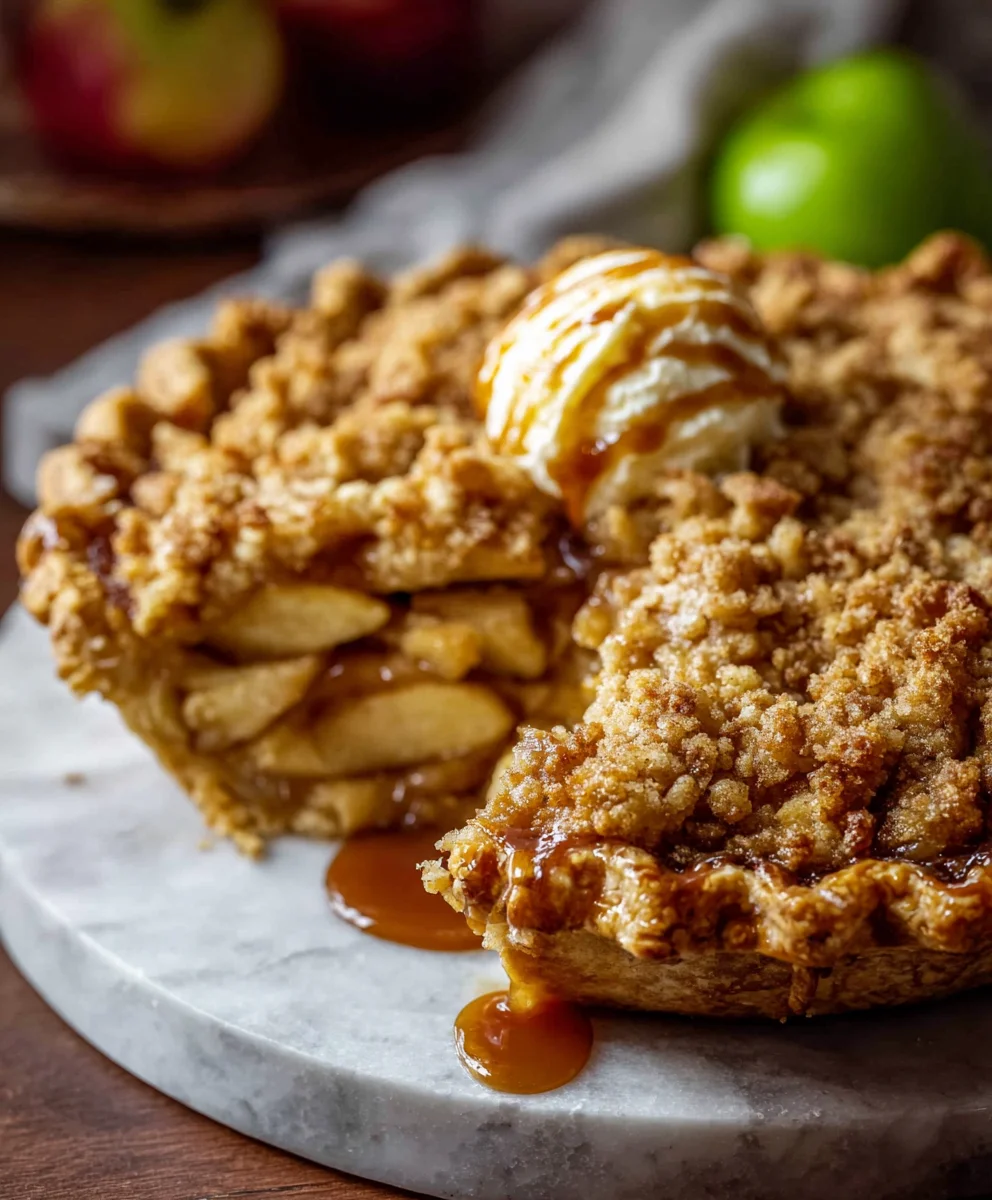
The streusel topping is what truly distinguishes a Dutch Apple Pie! It’s sweet, buttery, and provides a wonderful textural contrast to the soft apple filling.
- Combine Dry Crumb Ingredients: In a medium mixing bowl, whisk together the 1 cup all-purpose flour, ½ cup packed light brown sugar, ¼ cup granulated sugar, ½ teaspoon ground cinnamon, and ¼ teaspoon salt.
- Cut in the Butter (Again!): Add the ½ cup of very cold, cubed unsalted butter to the dry ingredients. Using a pastry blender or your fingertips, cut the butter into the flour mixture until coarse crumbs form. You want a mixture that resembles wet sand, with some larger pea-sized clumps. Do not overmix; the beauty of a crumb topping is its irregular texture. If you overwork it, you’ll end up with a paste rather than distinct crumbs. I often use my fingers here, rubbing the butter into the flour mixture until I get those lovely varied sizes of crumbs.
- Set Aside: Your crumb topping is ready! Set it aside while we assemble the pie.
Assembling Your Sweet Dutch Apple Pie
Now comes the exciting part – bringing all these wonderful components together into one glorious pie!
- Preheat Oven: Preheat your oven to 400°F (200°C). Make sure your oven rack is in the lower-middle position to ensure the bottom crust bakes through nicely.
- Fill the Crust: Retrieve your chilled pie crust from the refrigerator. Spoon the prepared apple filling into the pie crust, mounding it slightly in the center. Don’t be shy; you want a generous filling! The apples will cook down, so a slight mound is perfect. Try to arrange them somewhat evenly.
- Top with Crumb: Evenly sprinkle the entire crumb topping mixture over the apples, making sure to cover the apples completely right up to the edges of the crust. Gently press the crumbs down just slightly to adhere them to the apples.
Baking the Pie to Golden Perfection
Patience, my friend, is a virtue when baking pie. The aromas that will soon fill your kitchen will be absolutely intoxicating!
- Initial High Heat Bake: Place the pie on a baking sheet (this helps catch any potential drips and makes transferring easier). Bake at 400°F (200°C) for 15-20 minutes. This initial burst of high heat helps to set the bottom crust and get the crumb topping beautifully golden.
- Reduce Heat and Continue Baking: After 15-20 minutes, reduce the oven temperature to 375°F (190°C). Continue to bake for another 45-60 minutes, or until the crumb topping is deeply golden brown, and the apple filling is bubbly and tender.
- Check for Doneness: To check if the apples are tender, carefully insert a thin, sharp knife into the center of the pie (through the crumbs and apples). If it slides in easily with little resistance, your apples are done! If the crust or topping starts to brown too quickly, you can loosely tent the pie with aluminum foil for the remaining baking time.
- The Importance of Bubbling: You absolutely want to see the filling bubbling up through the crumb topping. This indicates that the juices are thickening properly. If it’s not bubbling, it might need more time for the starches to activate.
Cooling and Serving Your Masterpiece
This is arguably the hardest part – waiting for your pie to cool! But trust me, it’s essential for a perfectly set filling.
- Cool Completely: Once baked, remove the pie from the oven and place it on a wire rack to cool completely. This will take at least 3-4 hours, or even longer, at room temperature. This step is non-negotiable! If you slice into a warm pie, the filling will be runny. As it cools, the fruit juices and thickeners set up, giving you those beautiful, clean slices.
- Serve and Enjoy: Once fully cooled, your Sweet Dutch Apple Pie is ready to be devoured! I love serving it slightly warmed (a quick zap in the microwave for individual slices works wonders) with a generous scoop of vanilla bean ice cream or a dollop of freshly whipped cream. The warm, spiced apples and buttery crumbs are heavenly against cold, creamy ice cream.
- Storage: Leftover pie can be stored at room temperature, loosely covered, for up to 2 days, or in the refrigerator for up to 4-5 days. If refrigerating, let it come to room temperature or gently warm individual slices before serving for the best flavor and texture.
I genuinely hope you enjoy baking and sharing this Sweet Dutch Apple Pie as much as I do. It’s a recipe filled with love, warmth, and irresistible flavors that are sure to become a family favorite!
Ingredients:
Oh, I am just thrilled to share my absolute favorite Sweet Dutch Apple Pie recipe with you today! This isn’t just any apple pie; it’s a symphony of tender, spiced apples nestled under a delightful, buttery crumb topping, all encased in a flaky, golden crust. It’s the kind of pie that makes your house smell like a dream and brings everyone running to the kitchen. Get ready to bake a masterpiece!
-
For the Flaky Pie Crust (Bottom Crust Only):
- All-Purpose Flour: 1 ¼ cups (about 150 grams). I always recommend using a good quality unbleached all-purpose flour for the best texture.
- Granulated Sugar: 1 tablespoon. Just a touch to sweeten the crust and help with browning.
- Salt: ½ teaspoon. Essential for flavor balance, don’t skip it!
- Unsalted Butter: ½ cup (1 stick or 113 grams), very cold and cut into ½-inch cubes. The colder the butter, the flakier your crust will be. I often pop it in the freezer for 10-15 minutes before I start.
- Ice Water: 4-6 tablespoons. The ice is key here; it keeps the butter from melting too quickly.
-
For the Luscious Apple Filling:
- Apples: 6-8 medium-sized apples (about 2 ½ – 3 pounds total). For a truly magnificent Sweet Dutch Apple Pie, I love using a mix of sweet and tart apples. My go-to combination is Granny Smith for tartness and Honeycrisp or Fuji for sweetness and texture. They hold their shape beautifully!
- Granulated Sugar: ½ cup. Adjust this amount based on the sweetness of your apples and your personal preference.
- Light Brown Sugar: ¼ cup, packed. This adds a lovely molasses note and depth of flavor.
- All-Purpose Flour: ¼ cup. This acts as our thickener, ensuring a perfectly set filling.
- Ground Cinnamon: 1 ½ teaspoons. Warm and inviting, it’s the heart of apple pie spice.
- Ground Nutmeg: ½ teaspoon. Freshly grated, if you can, it makes a huge difference!
- Ground Allspice: ¼ teaspoon. A little touch for complexity.
- Lemon Juice: 1 tablespoon. Brightens the flavors and prevents the apples from browning.
- Unsalted Butter: 2 tablespoons, melted. A little richness never hurt anyone!
-
For the Irresistible Crumb Topping (Streusel):
- All-Purpose Flour: 1 cup (about 120 grams).
- Light Brown Sugar: ½ cup, packed. For that classic caramel-like sweetness.
- Granulated Sugar: ¼ cup.
- Ground Cinnamon: ½ teaspoon. Enhances the apple flavors beautifully.
- Salt: ¼ teaspoon. Balances the sweetness.
- Unsalted Butter: ½ cup (1 stick or 113 grams), very cold and cut into ½-inch cubes. Just like with the crust, cold butter is your best friend here for that delightful crumbly texture.
-
Tools You’ll Need:
- 9-inch pie plate
- Large mixing bowls (at least 3)
- Pastry blender or food processor (for the crust and topping)
- Rolling pin
- Vegetable peeler and apple corer
- Measuring cups and spoons
- Wire rack for cooling
Crafting the Perfect Pie Crust
First things first, let’s get that glorious pie crust ready. A good crust is the foundation of any fantastic pie, and I promise you, making it from scratch is incredibly rewarding.
- Combine Dry Ingredients: In a large mixing bowl, whisk together the 1 ¼ cups of all-purpose flour, 1 tablespoon of granulated sugar, and ½ teaspoon of salt. Make sure it’s all nicely combined before moving on.
- Cut in the Butter: Now for the magic! Add your ½ cup of very cold, cubed unsalted butter to the dry ingredients. Using a pastry blender, two knives, or even your fingertips (work quickly to keep the butter cold!), cut the butter into the flour mixture until it resembles coarse meal with some pea-sized pieces of butter remaining. This step is crucial for flakiness! Don’t overmix; you want those distinct butter pieces. If you have a food processor, you can pulse the butter and flour together for about 10-15 seconds until the desired texture is achieved.
- Add Ice Water: Gradually add the ice water, 1 tablespoon at a time, mixing lightly with a fork after each addition. I usually start with 4 tablespoons and add more only if absolutely necessary. You’re looking for the dough to just come together when pinched between your fingers. It should be moist enough to hold its shape but not sticky or wet.
- Form and Chill: Gently gather the dough into a disc. Try not to knead it too much, as overworking develops the gluten and can lead to a tough crust. Wrap the disc tightly in plastic wrap and refrigerate it for at least 30 minutes, or up to 2 days. Chilling the dough allows the gluten to relax and the butter to firm up, making it easier to roll and ensuring a tender crust.
- Roll out the Crust: When you’re ready to bake, remove the dough from the refrigerator and let it sit at room temperature for about 5-10 minutes to soften slightly, making it easier to roll. On a lightly floured surface, roll the dough into a 12-inch circle, about ⅛-inch thick. Periodically lift and rotate the dough to prevent sticking and ensure an even shape.
- Transfer to Pie Plate: Carefully transfer the rolled-out dough to your 9-inch pie plate. You can do this by gently rolling it over your rolling pin and unrolling it into the plate, or by folding it in quarters and unfolding it. Fit the dough snugly into the plate, pressing it against the bottom and sides without stretching it.
- Trim and Crimp: Trim the edges of the dough, leaving about a ½-inch overhang. Fold this overhang under itself, creating a thicker edge. Now, you can crimp the edges decoratively using your fingers or a fork. I love a classic fluted edge!
- Chill Again: Place the prepared pie crust back into the refrigerator while you prepare the filling. This helps prevent shrinkage during baking.
Preparing the Aromatic Apple Filling
Ah, the heart of our Sweet Dutch Apple Pie! The filling needs to be perfectly balanced in sweetness, spice, and texture. This is where those mixed apples truly shine.
- Prepare the Apples: First, peel, core, and slice your 6-8 medium apples. I like to slice them about ¼-inch thick. This ensures they cook evenly and retain a bit of texture without becoming mushy. Place all the sliced apples into a very large mixing bowl.
- Add the Wet Ingredients: Drizzle the 1 tablespoon of lemon juice and 2 tablespoons of melted unsalted butter over the apples. Toss gently to coat. The lemon juice helps prevent browning and adds a lovely bright note that cuts through the richness.
- Combine Dry Filling Ingredients: In a separate medium bowl, whisk together the ½ cup granulated sugar, ¼ cup packed light brown sugar, ¼ cup all-purpose flour, 1 ½ teaspoons ground cinnamon, ½ teaspoon ground nutmeg, and ¼ teaspoon ground allspice. Make sure there are no lumps, especially from the brown sugar.
- Toss Apples with Spices: Pour the dry spice mixture over the apples in the large bowl. Using a large spoon or your clean hands, gently toss the apples until they are evenly coated with the sugar and spice mixture. You’ll notice the apples will start to release some of their juices as they sit with the sugar. This is perfectly normal and desired! Let them sit for a few minutes while you make the crumb topping.
Crafting the Delightful Crumb Topping
The streusel topping is what truly distinguishes a Dutch Apple Pie! It’s sweet, buttery, and provides a wonderful textural contrast to the soft apple filling.
- Combine Dry Crumb Ingredients: In a medium mixing bowl, whisk together the 1 cup all-purpose flour, ½ cup packed light brown sugar, ¼ cup granulated sugar, ½ teaspoon ground cinnamon, and ¼ teaspoon salt.
- Cut in the Butter (Again!): Add the ½ cup of very cold, cubed unsalted butter to the dry ingredients. Using a pastry blender or your fingertips, cut the butter into the flour mixture until coarse crumbs form. You want a mixture that resembles wet sand, with some larger pea-sized clumps. Do not overmix; the beauty of a crumb topping is its irregular texture. If you overwork it, you’ll end up with a paste rather than distinct crumbs. I often use my fingers here, rubbing the butter into the flour mixture until I get those lovely varied sizes of crumbs.
- Set Aside: Your crumb topping is ready! Set it aside while we assemble the pie.
Assembling Your Sweet Dutch Apple Pie
Now comes the exciting part – bringing all these wonderful components together into one glorious pie!
- Preheat Oven: Preheat your oven to 400°F (200°C). Make sure your oven rack is in the lower-middle position to ensure the bottom crust bakes through nicely.
- Fill the Crust: Retrieve your chilled pie crust from the refrigerator. Spoon the prepared apple filling into the pie crust, mounding it slightly in the center. Don’t be shy; you want a generous filling! The apples will cook down, so a slight mound is perfect. Try to arrange them somewhat evenly.
- Top with Crumb: Evenly sprinkle the entire crumb topping mixture over the apples, making sure to cover the apples completely right up to the edges of the crust. Gently press the crumbs down just slightly to adhere them to the apples.
Baking the Pie to Golden Perfection
Patience, my friend, is a virtue when baking pie. The aromas that will soon fill your kitchen will be absolutely intoxicating!
- Initial High Heat Bake: Place the pie on a baking sheet (this helps catch any potential drips and makes transferring easier). Bake at 400°F (200°C) for 15-20 minutes. This initial burst of high heat helps to set the bottom crust and get the crumb topping beautifully golden.
- Reduce Heat and Continue Baking: After 15-20 minutes, reduce the oven temperature to 375°F (190°C). Continue to bake for another 45-60 minutes, or until the crumb topping is deeply golden brown, and the apple filling is bubbly and tender.
- Check for Doneness: To check if the apples are tender, carefully insert a thin, sharp knife into the center of the pie (through the crumbs and apples). If it slides in easily with little resistance, your apples are done! If the crust or topping starts to brown too quickly, you can loosely tent the pie with aluminum foil for the remaining baking time.
- The Importance of Bubbling: You absolutely want to see the filling bubbling up through the crumb topping. This indicates that the juices are thickening properly. If it’s not bubbling, it might need more time for the starches to activate.
Cooling and Serving Your Masterpiece
This is arguably the hardest part – waiting for your pie to cool! But trust me, it’s essential for a perfectly set filling.
- Cool Completely: Once baked, remove the pie from the oven and place it on a wire rack to cool completely. This will take at least 3-4 hours, or even longer, at room temperature. This step is non-negotiable! If you slice into a warm pie, the filling will be runny. As it cools, the fruit juices and thickeners set up, giving you those beautiful, clean slices.
- Serve and Enjoy: Once fully cooled, your Sweet Dutch Apple Pie is ready to be devoured! I love serving it slightly warmed (a quick zap in the microwave for individual slices works wonders) with a generous scoop of vanilla bean ice cream or a dollop of freshly whipped cream. The warm, spiced apples and buttery crumbs are heavenly against cold, creamy ice cream.
- Storage: Leftover pie can be stored at room temperature, loosely covered, for up to 2 days, or in the refrigerator for up to 4-5 days. If refrigerating, let it come to room temperature or gently warm individual slices before serving for the best flavor and texture.
I genuinely hope you enjoy baking and sharing this Sweet Dutch Apple Pie as much as I do. It’s a recipe filled with love, warmth, and irresistible flavors that are sure to become a family favorite!
Conclusion:
And there you have it, my friends! We’ve reached the sweet finale of our baking journey, and I genuinely hope you’re feeling inspired and eager to get into your kitchen. If there’s one recipe I could implore you to try this season, it’s this magnificent creation. What makes this particular recipe an absolute must-bake, you ask? It’s the perfect harmony of textures and flavors that truly sets it apart. Imagine biting into that tender, spiced apple filling, a warm embrace of cinnamon, nutmeg, and perhaps a whisper of cardamom, all nestled beneath the most delightful, crumbly streusel topping. That golden, buttery crunch on top, with its delicate sweetness, contrasts exquisitely with the soft, yielding apples below. It’s not just a dessert; it’s an experience, a journey for your taste buds that evokes comfort, warmth, and pure joy with every single forkful. The aroma alone as it bakes will fill your home with an intoxicating fragrance, promising a treat that delivers far beyond expectations. This isn’t just any apple pie; it’s a testament to the simple, profound pleasure of home baking, creating something truly special from scratch. Its rustic charm makes it inviting, while its sophisticated flavor profile will impress even the most discerning palate.
Elevate Your Pie Experience: Serving Suggestions
Now that your incredible creation is out of the oven, cooled just enough to be safely handled, let’s talk about the best ways to enjoy it. While this pie is absolutely divine on its own, a few simple additions can elevate it to legendary status. My personal favorite way to serve a slice is still the classic “à la mode,” with a generous scoop of good quality vanilla bean ice cream melting ever so slightly into the warm crevices of the pie. The cold creaminess against the warm, fruity sweetness is simply heavenly. But don’t stop there! A dollop of freshly whipped cream, perhaps infused with a hint of vanilla or a whisper of bourbon, also makes for a luxurious topping. For those who enjoy a bit of tang, a thin slice of sharp cheddar cheese served alongside can be surprisingly delightful, offering a lovely counterpoint to the pie’s sweetness. This is a classic pairing that might sound unusual to some, but it’s a revelation once tried. Consider drizzling a touch of homemade caramel sauce or a berry coulis for an extra layer of decadence and visual appeal. This pie is also incredibly versatile for different occasions – it’s perfect for a cozy weeknight dessert, the star of a holiday meal, or a much-appreciated contribution to any potluck or family gathering. You can also pair it with a strong cup of coffee, a fragrant Earl Grey tea, or even a glass of mulled wine on a chilly evening.
Unleash Your Inner Baker: Exciting Variations
One of the beautiful things about baking is the freedom to experiment and make a recipe truly your own. While our foundational recipe for the Sweet Dutch Apple Pie is foolproof, I encourage you to play around with it! For instance, if you want to diversify the apple flavor, try using a mix of two or three different varieties – perhaps a Granny Smith for tartness, a Honeycrisp for sweetness, and a Braeburn for texture. This blend can add a wonderful complexity to the filling. You could also get creative with the spices; while cinnamon is king, a pinch of allspice, ground ginger, or even a tiny amount of ground cloves can add intriguing depth. For the streusel topping, consider incorporating toasted chopped nuts like pecans or walnuts for an extra layer of crunch and nutty flavor. A handful of rolled oats mixed into the streusel can also give it a heartier, chewier texture. If you’re feeling adventurous, a subtle zest of orange or lemon in the apple filling can brighten the entire pie with a citrusy lift. For those with dietary considerations, this recipe is quite adaptable; you can often substitute gluten-free flour blends for the crust and streusel, and use dairy-free butter alternatives with great success. The possibilities are truly endless, allowing you to tailor this classic to your unique tastes and preferences.
So, what are you waiting for? Grab your apron, preheat that oven, and embark on this delightful baking adventure. I promise you, the reward of a homemade, fragrant slice of this pie is immeasurable. There’s a profound satisfaction in creating something so delicious with your own hands. Once you’ve pulled that golden-brown beauty from the oven and savored your first bite, please come back and share your experience with me! I absolutely adore hearing about your triumphs, your variations, and seeing your beautiful creations. Did you add something unique? Did it become a new family favorite? Your stories and photos inspire me and our entire community of bakers. Happy baking, my friends, and may your kitchen always be filled with the sweet aroma of freshly baked pie!
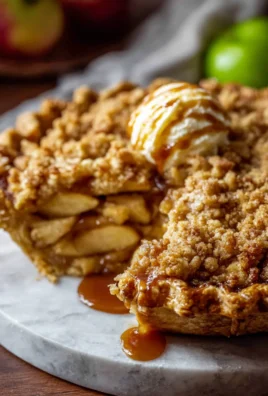
Homemade Sweet Dutch Apple Pie
Sweet Dutch Apple Pie is a comforting dessert featuring tender, spiced apples beneath a buttery, golden streusel topping, all encased in a flaky crust. It’s a cherished classic perfect for any occasion.
Ingredients
-
3/4 tsp nutmeg
-
1/2 tsp cardamom (optional, adds warm complexity)
-
1/4 tsp lemon zest (freshly grated for best flavor)
-
1/2 cup sugar
-
1/2 tsp kosher salt
-
1/3 cup all-purpose flour (King Arthur preferred)
-
1 1/2 tsp cinnamon (freshly ground for more spice)
-
1/2 cup brown sugar (packed)
-
5 lb apples (a mix of Granny Smith and Honeycrisp works well)
-
1 tsp vanilla
-
2 tbsp lemon juice (from 1/2 lemon)
-
1 1/2 cups all-purpose flour
-
1/3 cup sugar
-
1/2 tsp kosher salt
-
3/4 cup melted butter (Kerrygold unsalted preferred for rich flavor)
Instructions
-
Step 1
In a bowl, whisk 1 ¼ cups flour, 1 tbsp granulated sugar, ½ tsp salt. Cut in ½ cup very cold butter until pea-sized crumbs form. Gradually add 4-6 tbsp ice water until dough comes together. Form a disc, wrap, and chill for at least 30 minutes. Roll dough to a 12-inch circle, transfer to a 9-inch pie plate, trim ½-inch overhang, and crimp edges. Chill crust again. -
Step 2
Peel, core, and slice 6-8 medium apples (about ¼-inch thick). In a large bowl, toss apples with 1 tbsp lemon juice and 2 tbsp melted unsalted butter. In a separate bowl, whisk ½ cup granulated sugar, ¼ cup packed light brown sugar, ¼ cup all-purpose flour, 1 ½ tsp ground cinnamon, ½ tsp ground nutmeg, and ¼ tsp ground allspice. Pour dry mixture over apples and toss until evenly coated. -
Step 3
In a medium bowl, whisk 1 cup all-purpose flour, ½ cup packed light brown sugar, ¼ cup granulated sugar, ½ tsp ground cinnamon, and ¼ tsp salt. Cut in ½ cup very cold unsalted butter until coarse crumbs resembling wet sand form. Set aside. -
Step 4
Preheat oven to 400°F (200°C). Spoon apple filling into the chilled pie crust, mounding slightly. Evenly sprinkle crumb topping over apples, gently pressing down. Place pie on a baking sheet. -
Step 5
Bake at 400°F (200°C) for 15-20 minutes. Reduce oven to 375°F (190°C) and bake for another 45-60 minutes, until topping is deeply golden brown and filling is bubbly and tender (check with a knife). If browning too fast, tent with foil. -
Step 6
Remove from oven and cool completely on a wire rack for at least 3-4 hours (essential for setting). Serve slightly warmed with vanilla ice cream or whipped cream. Store leftovers loosely covered at room temperature for up to 2 days, or refrigerated for 4-5 days.
Important Information
Nutrition Facts (Per Serving)
It is important to consider this information as approximate and not to use it as definitive health advice.
Allergy Information
Please check ingredients for potential allergens and consult a health professional if in doubt.
Leave a Comment