
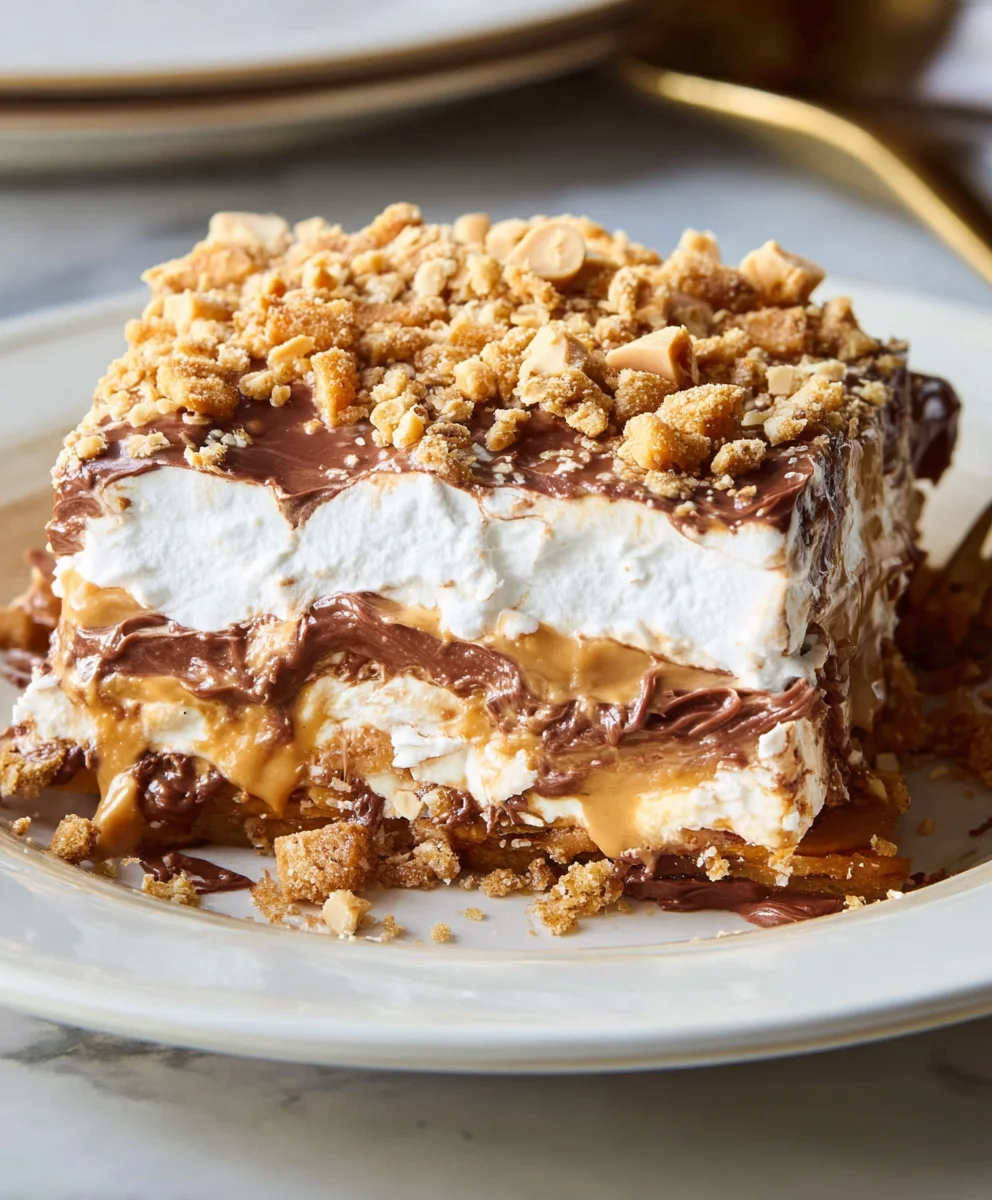
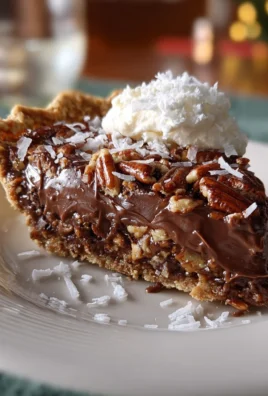
Peanut Butter Crunch Lasagna isn’t just another dessert; it’s a celebration in a pan, a symphony of flavors and textures designed to captivate your taste buds from the very first bite. Prepare to have your expectations of what a ‘lasagna’ can be delightfully shattered.
I am thrilled to introduce you to a culinary creation that perfectly blends the irresistible richness of peanut butter with the satisfying crunch of your favorite cookies, all layered with creamy, dreamy perfection. While its namesake evokes images of savory Italian classics, this modern marvel is a testament to inventive dessert making, born from a desire for decadence that’s both exciting and incredibly accessible. It’s a dish that has carved its own niche, evolving from simple no-bake treats into a truly show-stopping centerpiece for any occasion.
What makes this particular dish so universally adored? It’s the impeccable balance of sweet and salty, the velvety smoothness contrasted with delightful crispiness, and the sheer joy of a dessert that requires no oven time. This Peanut Butter Crunch Lasagna delivers a comforting, nostalgic flavor that appeals to everyone, yet feels wonderfully gourmet and unique. Whether you’re hosting a party, looking for a potluck showstopper, or simply treating your family to something extraordinary, this recipe promises ease, elegance, and an unforgettable taste experience.

Ingredients:
Get ready to gather your delicious components for this spectacular Peanut Butter Crunch Lasagna! I’ve broken down the ingredients by layer to make your preparation a breeze. Remember, fresh ingredients always yield the best results!
-
For the Irresistible Cookie Crust:
- 36 Chocolate Sandwich Cookies (about 3 packages of the regular size, like Oreos). I personally love using the chocolate sandwich cookies because their dark cocoa flavor provides a beautiful contrast to the sweet peanut butter. Make sure they are the regular kind, not the double-stuffed, as we want a specific ratio for the crust.
- ½ cup (1 stick) Unsalted Butter, melted. Using unsalted butter gives you more control over the overall saltiness of the dish, though if you only have salted on hand, it will work just fine – simply skip any added salt elsewhere in the recipe.
-
For the Dreamy Creamy Peanut Butter Layer:
- 1 (8-ounce) package Cream Cheese, softened to room temperature. This is crucial for a smooth, lump-free filling! If your cream cheese isn’t soft enough, you’ll end up with a chunky texture, and we’re aiming for silky smooth perfection for our Peanut Butter Crunch Lasagna.
- 1 cup Creamy Peanut Butter (about 250g). I prefer creamy for this layer to ensure a silky texture, but if you’re a fan of a little extra texture, a natural, smooth peanut butter can also work, just be sure to stir it well first. Avoid overly oily or crunchy varieties here.
- 1 cup Powdered Sugar (confectioners’ sugar). This provides sweetness and helps stabilize the filling. Sifting it beforehand can prevent lumps.
- 1 (8-ounce) container Frozen Whipped Topping, thawed (like Cool Whip). This lightens the peanut butter mixture, making it airy and delightful. Make sure it’s fully thawed in the refrigerator before using, but still very cold.
-
For the Decadent Chocolate Pudding Layer:
- 2 (3.9-ounce) packages Instant Chocolate Fudge Pudding Mix. Instant pudding is our secret weapon for speed and convenience in this no-bake dessert. The fudge flavor adds extra richness that complements the peanut butter beautifully.
- 3 cups Cold Milk (whole milk or 2% milk work best for thickness). The colder the milk, the faster and thicker your pudding will set.
-
For the Crunch-tastic Topping:
- 1 cup Roasted Peanuts, chopped (salted or unsalted, depending on your preference). I love the added savory note from lightly salted peanuts, which really elevates the flavor profile of the Peanut Butter Crunch Lasagna.
- 1 ½ cups Miniature Peanut Butter Cups, roughly chopped. Reese’s Minis are perfect here, adding pockets of pure peanut butter and chocolate bliss.
- ½ cup Heath Bar Toffee Bits (or another chocolate-covered toffee candy, crushed). This is where a big part of the “crunch” comes from, providing a lovely textural contrast and a hint of buttery toffee flavor.
-
For the Fluffy Final Layer & Garnish:
- 1 (8-ounce) container Frozen Whipped Topping, thawed. This will be the beautiful snowy cap to our dessert, providing a light finish to all the rich layers.
- Optional: Additional chocolate syrup and/or peanut butter sauce for drizzling. A little extra flourish never hurts!
- Optional: A few extra chopped mini peanut butter cups or chocolate shavings for decoration.
Phase 1: Building the Sturdy Cookie Crust
The foundation of any great lasagna, even a dessert one, is a strong base! For our Peanut Butter Crunch Lasagna, this means a perfectly pressed cookie crust.
-
Prepare Your Cookies: Start by crushing your chocolate sandwich cookies. I find the easiest way to do this is in a food processor. Pulse them until they resemble fine crumbs – think sand-like consistency, no large chunks please! If you don’t have a food processor, place the cookies in a large zip-top bag, seal it, and crush them with a rolling pin or the bottom of a heavy pan. This can be a fun, stress-relieving step!
Tip for Perfect Crumbs:
Make sure there are no large cookie pieces left. These can make the crust uneven and harder to cut later. Finer crumbs absorb the butter better, leading to a more cohesive crust.
-
Combine with Butter: In a medium-sized bowl, pour your melted butter over the cookie crumbs. Stir really well with a spoon or spatula until all the crumbs are evenly moistened. They should look like wet sand and clump together when squeezed.
-
Press into Pan: Transfer the buttery cookie mixture into a 9×13-inch baking dish. Use the bottom of a measuring cup or your clean hands to firmly and evenly press the crumbs into the bottom of the pan. Make sure it’s packed tightly from edge to edge to create a solid crust that won’t fall apart when you slice into your magnificent Peanut Butter Crunch Lasagna.
-
Initial Chill: Once pressed, pop the pan into the refrigerator for at least 30 minutes. This allows the butter to solidify and bind the crumbs, making for a much more stable crust.
Phase 2: Crafting the Creamy Peanut Butter Layer
This is arguably the star of our show, the rich and creamy peanut butter layer that gives this dessert its signature flavor profile. It’s incredibly simple to make, but oh-so-delicious!
-
Cream the Cream Cheese: In a large mixing bowl, using an electric mixer (either hand-held or stand mixer with a paddle attachment), beat the softened cream cheese on medium speed until it’s light, fluffy, and completely smooth. This usually takes about 2-3 minutes. Don’t skip the softening step! Hard cream cheese will result in lumps no matter how long you beat it.
-
Add Peanut Butter and Sugar: To the creamed cheese, add the creamy peanut butter and powdered sugar. Continue beating on medium speed until everything is fully incorporated and the mixture is smooth and velvety. Scrape down the sides of the bowl occasionally to ensure no ingredients are left unmixed. Taste it! Adjust sweetness if you dare, but I find this ratio perfect.
-
Fold in Whipped Topping: Gently fold in one of the thawed containers of whipped topping into the peanut butter mixture. Use a rubber spatula for this, using an up-and-over motion to keep as much air in the whipped topping as possible. You want the mixture to remain light and airy, not dense. Mix just until no streaks of whipped topping remain.
Why folding?
Folding maintains the airy texture from the whipped topping, which prevents the peanut butter layer from becoming too heavy or cloyingly rich. It creates that melt-in-your-mouth experience that is essential for this Peanut Butter Crunch Lasagna.
-
Spread Over Crust: Retrieve your chilled crust from the refrigerator. Carefully spoon the creamy peanut butter mixture evenly over the cookie crust. Gently spread it out using an offset spatula or the back of a spoon, making sure to create a smooth, consistent layer right to the edges of the pan.
-
Back to the Chill: Place the pan back into the refrigerator to chill for at least 30 minutes while you prepare the next layer. This helps the peanut butter layer firm up, preventing it from mixing with the pudding layer.
Phase 3: Developing the Decadent Chocolate Pudding Layer
The chocolate pudding layer is the classic companion to peanut butter, bringing a luscious, rich element to our Peanut Butter Crunch Lasagna. Using instant pudding makes this step incredibly quick!
-
Whisk the Pudding: In a large bowl, combine both packages of instant chocolate fudge pudding mix with the cold milk. Whisk vigorously for about 2-3 minutes until the mixture starts to thicken. Make sure to get into the corners of the bowl to ensure all the powder is dissolved.
-
Let it Set Slightly: Allow the pudding to sit for about 5 minutes to fully set and thicken. It should be quite firm by now. If it still seems too liquidy, whisk for another minute or so.
-
Layer the Pudding: Carefully spoon the thickened chocolate pudding over the chilled peanut butter layer. Gently spread it out evenly with an offset spatula or the back of a spoon. Be mindful not to disturb the peanut butter layer underneath. We want clean, distinct layers for our Peanut Butter Crunch Lasagna!
-
More Chilling Time: Return the pan to the refrigerator for at least another 30 minutes. This allows the chocolate pudding to become very firm, providing a stable base for our exciting crunch layer.
Phase 4: Adding the Irresistible Crunch
This is where the “crunch” in Peanut Butter Crunch Lasagna truly shines! The combination of peanuts, mini peanut butter cups, and toffee bits provides an explosion of texture and flavor.
-
Prepare Your Crunch: While your lasagna is chilling, gather your crunch components. If your roasted peanuts aren’t already chopped, give them a rough chop. Similarly, if your miniature peanut butter cups are whole, cut them into halves or quarters. You want pieces that are big enough to provide a bite, but not so large they’re difficult to eat. Combine the chopped peanuts, chopped miniature peanut butter cups, and Heath Bar toffee bits in a medium bowl and give them a good stir to mix.
Customize Your Crunch!
Feel free to experiment with other crunchy additions here! Pretzels for a salty kick, crushed butterfingers for more peanut butter goodness, or even some mini chocolate chips could be fantastic additions to your Peanut Butter Crunch Lasagna. This is where your creativity can truly shine.
-
Layer the Crunch: Once the chocolate pudding layer is firm, sprinkle the entire crunch mixture evenly over the top. Gently press down ever so slightly with your hands to ensure the pieces adhere to the pudding layer, but don’t press too hard, or you’ll push them into the soft pudding.
-
Final Pre-Garnish Chill: Place the pan back in the refrigerator for at least 15-20 minutes. This little extra chill time helps everything meld together before the final topping.
Phase 5: Finishing Touches and the Essential Final Chill
Almost there! The final layer of whipped topping makes this Peanut Butter Crunch Lasagna look as good as it tastes, and the extended chilling time is non-negotiable for perfect slices.
-
Spread Final Whipped Topping: Remove your almost-finished lasagna from the refrigerator. Gently spread the remaining thawed whipped topping evenly over the crunch layer. Use an offset spatula or the back of a spoon to create a beautiful, smooth top. Take your time to make it look appealing!
-
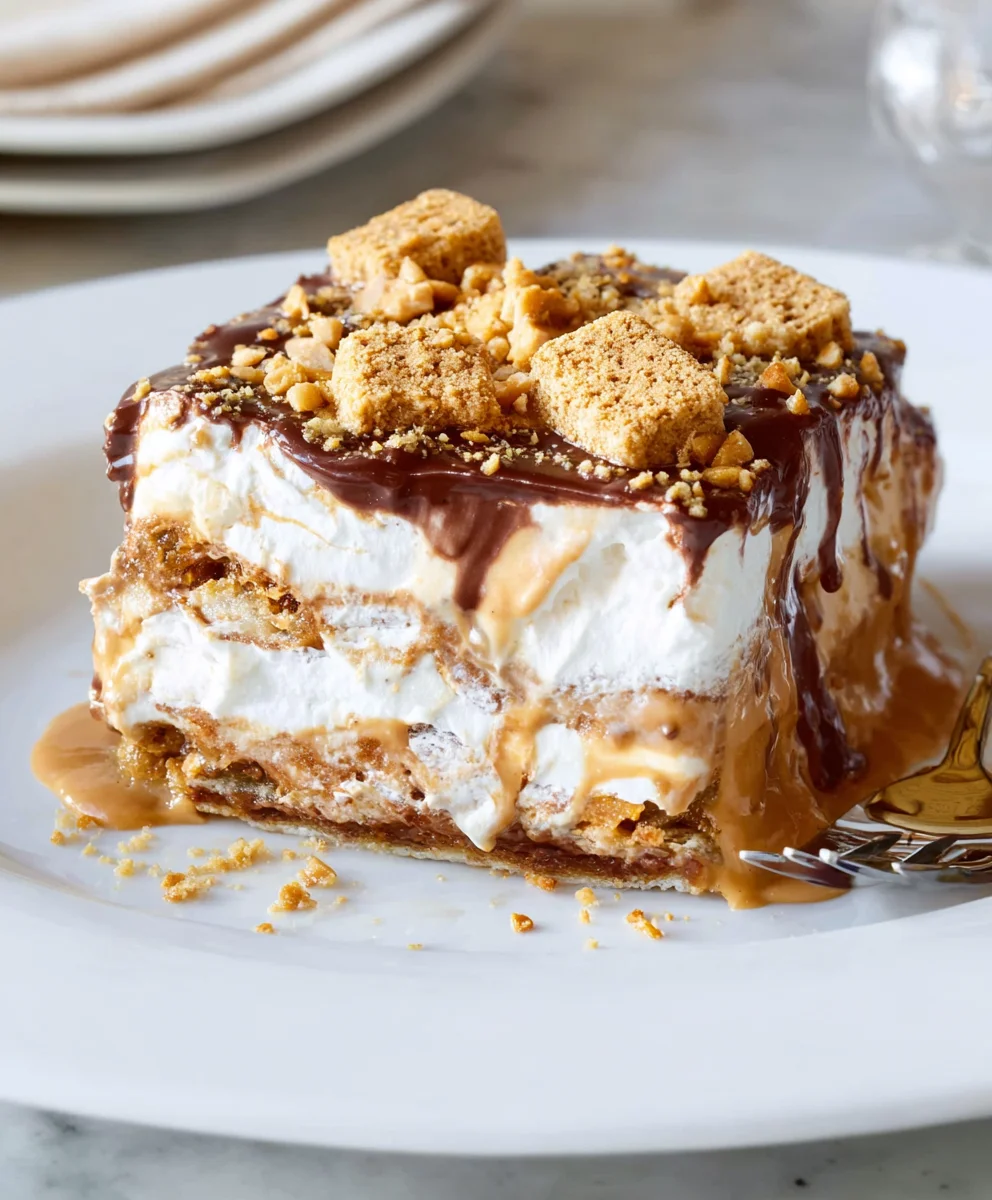
Garnish (Optional but Recommended!): This is your chance to add a little flair! Drizzle some chocolate syrup or a homemade peanut butter sauce over the top. Sprinkle with a few extra chopped mini peanut butter cups, some chocolate shavings, or even a few more crushed peanuts. Presentation makes a difference, and a pretty garnish always makes a dessert feel more special.
-
The Crucial Final Chill: Now, for the most important step for a perfect Peanut Butter Crunch Lasagna. Cover the baking dish tightly with plastic wrap and return it to the refrigerator. Allow it to chill for a minimum of 4 hours, but preferably overnight. This extended chilling time is absolutely essential for all the layers to set completely, making for clean, beautiful slices.
Why the long chill?
Each layer needs ample time to firm up and bind together. Rushing this step will result in a messy, uncooperative dessert that won’t hold its shape. Patience is a virtue, especially when it comes to no-bake layered desserts!
Serving Your Peanut Butter Crunch Lasagna
After all your hard work and patient waiting, it’s finally time to enjoy your masterpiece!
-
Slicing for Perfection: When you’re ready to serve, remove the dish from the refrigerator. For the cleanest slices, use a sharp knife that has been run under hot water and wiped dry before each cut. This prevents the layers from sticking and smearing. Slice into individual portions, usually 12-16 squares, depending on how generous you’re feeling.
-
Serve and Enjoy: Use a sturdy spatula to carefully lift each slice from the pan. Serve immediately to oohs and aahs! This Peanut Butter Crunch Lasagna is truly a crowd-pleaser and perfect for potlucks, parties, or a special family treat.
-
Storage: Any leftover Peanut Butter Crunch Lasagna should be covered tightly with plastic wrap and stored in the refrigerator. It will keep well for 3-4 days, though it rarely lasts that long in my house! The flavors often deepen overnight, making leftovers an even greater treat.
Conclusion:
Well, my friends, we’ve reached the sweet finale of our culinary journey with this incredible recipe, and I truly hope you’re as excited as I am about what we’ve created. This isn’t just another dessert; it’s an experience, a masterpiece of texture and flavor that I genuinely believe everyone needs to try. What makes this particular creation a standout? It’s the perfect harmony of contrasts. Imagine sinking your fork through a velvety smooth, rich peanut butter filling, encountering the delightful snap of a crunchy topping, and then meeting the soft, yielding base. It’s a symphony for your taste buds – sweet yet perfectly balanced, incredibly creamy but with an addictive crunch that keeps you coming back for more.
I’ve crafted this recipe to be surprisingly straightforward, proving that you don’t need to be a pastry chef to whip up something truly spectacular. The joy in making it is almost as good as the joy of eating it. It’s that showstopper dessert that looks incredibly impressive, yet comes together without breaking a sweat. Whether you’re aiming to impress guests at a dinner party, surprise your family with an extra-special treat, or simply indulge in a moment of pure bliss, this recipe delivers on all fronts. It’s a guaranteed crowd-pleaser, appealing to peanut butter lovers and dessert enthusiasts alike. The combination of classic comfort and sophisticated indulgence makes it utterly irresistible.
Now that you know why this dessert is a must-make, let’s talk about how to elevate your experience even further, or how to put your own creative spin on it.
Perfect Pairings:
While truly magnificent on its own, a slice of this dessert pairs beautifully with a few simple additions. I absolutely love serving it with a steaming hot cup of coffee or a tall, ice-cold glass of milk – the classic peanut butter pairing never fails! For an extra touch of decadence, a scoop of vanilla bean ice cream melting gently alongside each piece is divine, adding a wonderful temperature contrast. You could also offer a dollop of freshly whipped cream, perhaps lightly sweetened with a touch of vanilla extract, to complement the richness.
Creative Variations to Make It Your Own:
One of the best parts about baking is the freedom to experiment, and this recipe is incredibly forgiving and open to customization. Here are a few ideas to get your creative juices flowing:
- Nut Butter Alternatives: While I’m deeply fond of the classic peanut butter, feel free to experiment with other nut butters! Imagine an almond butter version for a slightly different flavor profile, or even a cashew butter for extra creaminess. Just ensure they have a similar consistency to maintain the structure.
- Crunch Factor Boosters: The crunch is a key element, so why not play with it? Instead of just crushed cookies, you could mix in finely chopped pretzels for a sweet and salty twist, or add a handful of roasted, chopped peanuts or cashews to the topping for an even nuttier experience. Mini chocolate chips or white chocolate chunks folded into the peanut butter layer would also add delightful textural surprises.
- Chocolate Lover’s Dream: For those who can’t get enough chocolate, consider drizzling melted dark chocolate or warm fudge sauce over individual slices just before serving. You could even swirl a thin layer of melted chocolate into the peanut butter mixture for a beautiful marble effect within the layers.
- Fruity Twist: While less common with peanut butter, a very thin layer of raspberry jam swirled into one of the creamy layers could offer a bright, tangy contrast that’s surprisingly delicious – think peanut butter and jelly in dessert form!
- Seasonal Flair: During the holiday season, a sprinkle of cinnamon or a dash of nutmeg could subtly warm the flavors, especially if you consider a “gingerbread crunch” base instead of a chocolate cookie one.
Don’t be afraid to make this recipe truly yours. I’ve given you the foundation, and now it’s your turn to build upon it!
So, what are you waiting for? I wholeheartedly encourage you to step into your kitchen and give this incredible creation a try. This Peanut Butter Crunch Lasagna is more than just a dessert; it’s a celebration of comfort, indulgence, and pure joy, all wrapped up in irresistible layers. I am absolutely confident that once you take that first bite, you’ll understand exactly why I’m raving about it so much. It’s truly one of those recipes that becomes an instant favorite, a go-to for special occasions, or just a treat to brighten an ordinary day.
When you do make it, please don’t keep your triumph to yourself! I would absolutely love to hear about your experience. Did you stick to the original recipe, or did you venture into your own creative variations? What did your family and friends think? Share your stories, your tips, and especially your glorious photos! Seeing your culinary creations brings me so much happiness and inspires me to keep sharing. Let’s build a community of enthusiastic bakers who aren’t afraid to indulge a little and spread some sweetness around. Happy baking, my friends, and get ready for a dessert experience you won’t soon forget!
Peanut Butter Crunch Lasagna
This easy, no-bake Peanut Butter Crunch Lasagna is a celebration of flavors and textures, blending the irresistible richness of peanut butter with creamy layers. Designed for delightful decadence, it’s a show-stopping dessert perfect for any occasion.
Ingredients
-
1 family size package Nutter Butter cookies
-
1 8-ounce package cream cheese, room temperature
-
1 ⅓ cup powdered sugar
-
3 cups frozen whipped topping, thawed
-
1 5.9 ounce box chocolate pudding mix
-
3 cups milk
-
½ cup peanut butter
Instructions
-
Step 1
Crush the family size package of Nutter Butter cookies until they resemble fine crumbs. Press the crumbs firmly and evenly into the bottom of a 9×13-inch baking dish. Place the pan in the refrigerator to chill for at least 30 minutes to help stabilize the crust. -
Step 2
In a large mixing bowl, beat the 8-ounce package of softened cream cheese with an electric mixer until light and smooth (2-3 minutes). Add the ½ cup creamy peanut butter and 1 ⅓ cup powdered sugar, beating until fully incorporated and velvety smooth. Gently fold in all 3 cups of thawed whipped topping until just combined. Spread this creamy mixture evenly over the chilled cookie crust. Return the pan to the refrigerator to chill for at least 30 minutes to firm up the layer. -
Step 3
In a separate large bowl, combine the 5.9 ounce instant chocolate pudding mix with 3 cups cold milk. Whisk vigorously for about 2-3 minutes until the mixture starts to thicken. Allow the pudding to sit for approximately 5 minutes to fully set. Carefully spoon and spread the thickened chocolate pudding evenly over the peanut butter layer. Return the pan to the refrigerator to chill for at least another 30 minutes. -
Step 4
Cover the baking dish tightly with plastic wrap and return it to the refrigerator for a minimum of 4 hours, but preferably overnight. This extended chilling time is essential for all the layers to set completely, making for clean, beautiful slices. When ready to serve, remove from the refrigerator. For the cleanest slices, use a sharp knife that has been run under hot water and wiped dry before each cut. Slice into 12-16 individual portions and serve immediately. Store any leftover Peanut Butter Crunch Lasagna covered tightly in the refrigerator for 3-4 days.
Important Information
Nutrition Facts (Per Serving)
It is important to consider this information as approximate and not to use it as definitive health advice.
Allergy Information
Please check ingredients for potential allergens and consult a health professional if in doubt.
Leave a Comment